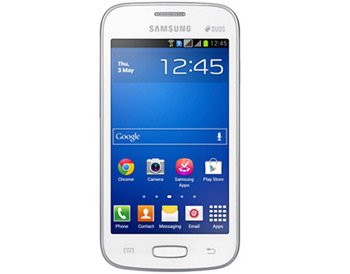
Update Galaxy Star Pro GT-S7262 to Jelly Bean 4.1.2 XEUANE1
Galaxy Star Pro GT-S7262 will benefit loads from an upgrade. If you ever want to perform one, we’re waiting for you here!
One of the most appropriate ways to update a device is via official firmware. The phone you own will certainly receive such a tool. Its name is Android 4.1.2 Jelly Bean XEUANE1. Launched for Russia, Ukraine, Uzbekistan and Kazakhstan this month, the firmware in question will only function on the Galaxy Star Pro GT-S7262.
The Jelly Bean 4.1.2 XEUANE1 is compatible with any other Android version. If you have a different device with another operating system, we recommend looking for a different guide.
The firmware we’re about to describe here is powered by an activated KIES logo. This allows your phone to be updated via the KIES software. If you opt for this method, do it only if there’s stock ROM on your handset.
The benefits of this official firmware
Once the right kind of smartphone is used, the benefits of an update will quickly reveal themselves. You will soon have access to extended Vsync timing. This won’t be the only novelty. The handset will get to enjoy stuff such as a new keyboard and new apps. Prepare to have better battery life, too. Also, get ready for pop up play and touch anticipation.
Your time will also be well-spent via sync and connect email updates. The new stuff will also include Google Now. Mini apps, customization tweaks and all share are also available. Wait, there’s more: a fixed frame of 60 fps and new features. The list goes on with an automatic adjustment for the size of widgets. Last but not least are these goodies: triple buffering, group cast and a free style widget.
As soon as you have an updated device, the latter will go through several things if it has root access. The upgrade affects both its system partition and said root access. The former will get deleted; the latter’s going to be revoked. Every important data on your phone will be safe. The handset’s internal and external SD cards will also stay out of harm’s way.
Prerequisites
Be ready for the update with these pre-requisites:
- backups are always a great thing to have, which means that you need to perform some;
- create a full NANDroid backup next;
- use a fully charged Galaxy Star Pro GT-S7262 for today’s important procedure;
- turn off the security programs on your handset;
- turn off the ones on your laptop;
- follow this tutorial only if you’re using a laptop featuring Windows;
- download USB drivers for the phone on your laptop;
- have your smartphone’s USB Debugging option turned on.
Step by step instructions
- The action that begins the procedure: download several packages on your laptop. They are as follows: the , , and then Odin v3.09 (from this page).
- If the download of both files is done, unzip them. Here you can use either WinRar or WinZip.
- Launch this file on the laptop next: Odin v3.09.exe to install this software on your computer.
- Do this now: boot the handset in Download Mode. This will require you to follow certain instructions. This is how they work: after you press and hold Home, Power and Volume Down simultaneously, a boot message will be shown. When you spot it on the screen, stop pressing those buttons. Instead, do this: press Volume Up.
- This next part of our guide deals with the following task: plug the phone to the laptop. This is what you should use for this action: the phone’s USB cable.
- Immediately afterwards, the Odin is going to try and locate your handset. When it does, it will give you a blue sign. When the connection is established, you’ll be free to add the firmware file to AP / PDA.
- There will be some boxes on the screen soon afterwards. Tap only these two: Auto Reboot and then F. Reset Time. A box called Re-partition is checked by default. You have to go and uncheck it.
- After you’ve done as such, tap “Start“. This will set the new firmware’s installation into motion. Give the procedure 15 minutes. If it isn’t completed after waiting like that, redo the steps.
- [sc name=”banner-jos”]Should the flashing be over, “Pass” will pop up and the handset shall reboot. Time to remove the USB cable from between your devices.
- When they are disconnected, tap Settings. After that is done, tap About Phone. The update tweaks we mentioned will come up soon.
Enjoy them for now. Should they prove to be disappointing, restore the old ROM. This is how it works: the NANDroid backup file has to be used. Once the old ROM is back, the update will be revoked.
Should problems show up, address your questions via our comment box below!


