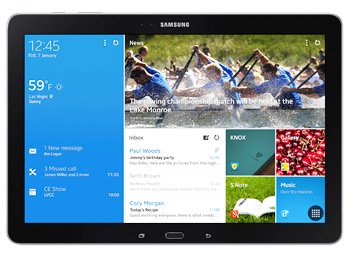
How to Update Galaxy Note Pro 12.2 SM-P900 to Kit Kat 4.4.2 XXUANC4
We’ve recently considered Galaxy Note Pro 12.2 SM-P900 and how to update it to Android 4.4.2 KitKat. And then we discovered the best firmware to use on this tablet. You will see it for yourself if you continue reading this post!
The new firmware we just came across for your Galaxy Note Pro 12.2 SM-P900 is this: XXUANC4. It will only update your device to this new OS if you use it instead of another tablet. This official firmware was revealed online this month for Netherlands.
The way the update works on a rooted tablet is different. In the sense that the gadget’s system partition will be the second element to be damaged. The first bad thing to happen to your device is this: its root access shall be revoked. Even if these two are damaged, the tablet’s content won’t disappear. Neither will its internal / external SD cards.
The novelties
With the update done, you will see that the tablet doesn’t encounter security problems. The most important advantage of owning an upgraded gadget is this: you’ll notice performance improvements. After that, your tablet will boast new features, customization options and new apps. The battery of your device will get to last more thanks to various tweaks.
The new firmware doesn’t sport an activated KIES logo. Once you’re aware of this, you can only perform the upgrade via our post or OTA. However, if your plans include the use of the second update option, you need a stock ROM on your tablet.
Prerequisites
Do the following before you flash the XXUANC4:
- perform the upgrade on a laptop that comes pre-installed with Windows;
- turn to your tablet and deactivate its security programs;
- then do the same as above for your notebook’s own security stuff;
- the important content inside your tablet must be saved with backups;
- once a regular backup is done, you have to also create a full NANDroid backup;
- the Samsung SM-P900 needs to perform the upgrade with a fully charged battery;
- you will have to download, on your laptop, some USB drivers that are meant for your tablet;
- turn on USB Debugging on the gadget.
Step by step instructions
Be sure to keep your notebook turned on. It has to have some packages downloaded and then saved on it.
- These packages are the and Odin v3.09, from this location. If they’re now saved on the device, unzip them both (with either WinRar, 7Zip or another tool you like), then launch, on the notebook, one particular file. Which should be this one: Odin v3.09.exe.
- When done, boot the tablet in Download Mode by performing the following actions: press and hold Home, Power and Volume Down simultaneously; when a boot screen appears on your display, you will need to press, instead, this key: Volume Up.
- For the next stage, take the tablet’s USB cord. This is what will establish a connection between the Galaxy Note Pro 12.2 P900 and your laptop. As soon as some minutes have passed since doing this, the Odin will show up with a sign in blue to signal a successful connection.
- Before you check Auto Reboot and F. Reset Time, you will need to add the firmware file to AP / PDA. Once the correct boxes are ticked, you should uncheck Re-partition and begin the firmware’s flashing. To finally put the flashing in motion, all you have to do is tap “Start” on the tablet.
- You will now be required to simply until your tablet’s touchscreen comes up with “Pass“. Wait again afterwards, this time for your gadget to restart.
- [sc name=”banner-jos”]If the Galaxy Note Pro 12.2 SM-P900 has just done the latter, you must unplug the tablet from the laptop afterwards. The XXUANC4 firmware along with the Android 4.4.2 KitKat will be there for you to discover. If you can’t wait to do that, here’s our tip on how to launch the new OS: click on Settings, then tap About Tablet.
Should you consider this operating system version a waste of time or you want the old ROM restored, go back to the NANDroid backup file. We asked you to create a full NANDroid backup for this reason: to help get the previous ROM back on the device.
If you have issues during or after this guide, we have a comment field below where you can leave questions.


