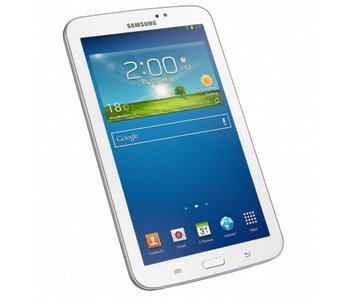
How to Flash Android 4.2.2 XXUANC1 on Galaxy Tab 3 Lite 7.0 SM-T110
We intend on providing an update guide for Galaxy Tab 3 Lite 7.0 SM-T110 below. If you follow the steps we prepared for you, the phone will have the fresh new Android 4.2.2 version soon.
To experience a proper upgrade, this tablet needs XXUANC1. This is new firmware that came out earlier this month for Poland and for the type of tablet you own. We have to stress the following idea: use this official firmware only if your tablet is the Galaxy Tab 3 Lite 7.0 SM-T110 variant.
The novelties
What can you expect from the update if your tablet is rooted? Two cons: root access will be revoked and system partition will be wiped. This piece of bad news is met by a good one: your tablet’s internal and external SD cards will not be affected. Neither will the important data.
As for the sort of goodies coming via the new OS, here is a look at them. The Android 4.2.2 Jelly Bean, helped by the XXUANC1, will deliver, first off, the option of long-pressing the WiFi Bluetooth icons in Quick Settings in order to be able to toggle the on/off state. Apart from that, your tablet is going to sport a USB debug white-list and low battery bug fixes. More to come: a new set of sounds for wireless charging and lots of customization options. A new set of download notifications, a new Gallery app and better Bluetooth audio streaming can also be counted. 
Prerequisites
Prepare for some requirements to take into account:
- perform a set of normal backups to save your tablet’s data;
- apply, next, a full NANDroid backup, using these step by step instructions;
- go here and download, on the laptop, USB drivers fit for your Samsung SM-T110;
- disable the security solutions installed on your laptop and the tablet;
- the tablet must function with a fully charged battery;
- be sure to have USB Debugging enabled on the tablet;
- only a notebook with Windows on will work with our tutorial.
Step by step instructions
Your notebook must feature the Android 4.2.2 Jelly Bean XXUANC1 official firmware for Poland and Odin v3.09.
- These are packages that you’ll find and on this page, so download them on your laptop as indicated. When done with them, save them and extract them afterwards with 7Zip or WinRar. Odin v3.09.exe should be one of the files that result from the extraction, so keep an eye out for it.
- That’s because you will need to open it on the notebook. Do this afterwards: enter your tablet in Download Mode. For this to be possible, press and hold, at the same time, Home, Power and Volume Down. A display with a boot message will then pop up; as soon as you spot it, press Volume Up.
- After being done with the previous step, plug the Galaxy Tab 3 Lite 7.0 SM-T110 to your laptop with the former’s USB cable. Wait until the Odin displays a blue sign, meaning that the connection between the devices is done.
- Follow this up with a different task: add the firmware file to AP / PDA. To move on, you need to check Auto Reboot and F. Reset Time. If Re-partition is checked from the factory, you must uncheck it, then do this: tap Start.
- The step that comes now tells you to give the installation process that will begin some time to end. So wait for approximately 14 minutes. If the tablet’s display has a green-colored message saying “Pass“, you will know that the new firmware is flashed on your tablet.
- [sc name=”banner-jos”]However, you need to wait for the gadget to restart before you can move on to the last step. After making sure the tablet is done with the previous process, unplug it from your laptop. You should now take a look at the XXUANC1. Find it like this: take your gadget, tap Settings on it, wait a bit, then tap this option: About Tablet.
The new firmware may come with plenty of goodies. But what if you find them less effective than you thought? Then you can get your tablet’s previous ROM. Like this: look for the NANDroid backup file, open it and use it. As soon as the device has its former tool back, the update will be revoked.
For questions or comments, you have a comment field below this post.


