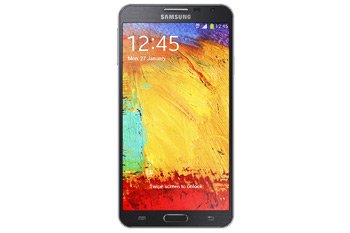
How to Flash Jelly Bean 4.3 XXUANB3 on Galaxy Note 3 Lite SM-N750
Android 4.3 is the newest version that can be installed on your Galaxy Note 3 Lite SM-N750. We’ll help you with that today!
The Android 4.3 can be added to your phablet via an update. This procedure needs XXUANB3, which is the most recent firmware made available for your handset. This new stock ROM came out for India this month. You won’t have to do much to flash this particular tool on your Galaxy Note 3 Lite.
For starters, you must only use the Samsung SM-N750 and no other model. If you do use a different phone, you will quickly end up with a bricked device. Second: a rooted handset will lose its system partition and its root access will be revoked. Despite all of this, no harm will be done to the internal / external SD cards. Also, the important content stored on your phone won’t be affected by the update.
The Android 4.3 Jelly Bean has plenty of offerings for your Galaxy Note 3 Lite N750. The ones that matter the most are these: ways to personalize the handset, tweaks, new features and no major bugs. All of these goodies will help your device last more, perform better and enjoy new stuff.
Prerequisites
An update always needs some pre-requisites. Below are the ones which work for your phone:
- the phone’s data should be preserved via backups, so create a couple of them;
- a full NANDroid backup should also be created;
- make sure your laptop has USB drivers downloaded on it;
- fully charge the phablet’s battery unit;
- have Windows run on your notebook instead of another operating system;
- turn on USB Debugging on your handset;
- go to your notebook and deactivate its security programs, then the ones running on your phone.
Step by step instructions
- Our requirements should be followed by this first step: download, on your personal notebook, Odin v3.09 and then , too. Make sure that both these files are saved on the notebook before you move to other tasks.
- After you check this, remember to use either WinRar or 7Zip to unzip the packages on your notebook. The unzipping has to be followed by another step: open, on your laptop, the Odin v3.09 that’s on it.
- We need you to do this next: boot the Galaxy Note 3 Lite SM-N750 in Download Mode. For this step, you have to do this: press and simultaneously hold Home, Power and Volume Down, then have patience for a short while. A boot message has to come up so that you can press Volume Up and complete this step. Having just entered your handset in Download Mode, you need to move on.
- Here’s what you should do now: plug your handset to your notebook. The tool which creates a connection between the devices is the SB card of your phone.
- Odin will then start to look for the latter. After several seconds, a sign in blue should be displayed in Odin. When it does, the plugging happened successfully, so go on by adding the firmware file to AP / PDA.
- Now do as follows: when several boxes are displayed on the screen, activate only 2 of them. Which are these: F. Reset Time and Auto Reboot. In case a third box, Re-partition, is checked by default, be sure to uncheck it.
- The XXUANB3 has to be installed on your smartphone now. To do that, you need to tap “Start” and then just wait for approximately 12 minutes. You will know if the flashing is done if the phone welcomes you with “Pass” in a green-colored background.
- As soon as this message appears, the handset is going to reboot on its own. This is your cue for the last step. Which tells you to do as follows: unplug the smartphone from the notebook.
- [sc name=”banner-jos”]The USB cord must be removed for this part. The very last thing to do now: go to Settings on your Galaxy Note 3 Lite SM-N750 and tap Settings. After that, tap another option: About Phone. This way, the new firmware will launch itself and will be able to personally check it out.
If you aren’t pleased with the new firmware, get the old ROM back. That’s why you had to create a NANDroid backup. Find the NANDroid backup file and open it to restore the former ROM on your smartphone.
Any sort of question will be answered if you leave it below!


