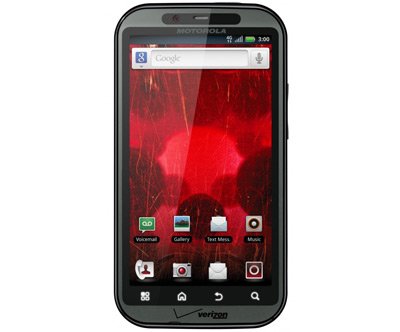
Update Motorola Droid Bionic XT875 to Jelly Bean 4.2.2 AvatarROM Build 3.1 custom ROM
Android 4.2.2 Jelly Bean AvatarROM Build 3.1 is meant only for Motorola’s Droid Bionic XT875 in the form of an update. You will know more on this if you watch this space.
The tutorial we have for our readers who own this smartphone will help your handset deliver a better performance; the handset’s battery is going to last longer, you will get offered the possibility to change how your phone acts and feels and so on.
Requirements
From this moment on, we will show those requirements which play a very important role, too:
- download and Gapps archive on the notebook, via this link;
- install USB drivers for the phone on the PC, using this location;
- charge the battery of your smartphone;
- use the bootloader + carrier unlocked Droid Bionic (from Verizon Wireless);
- turn on USB Debugging;
- create backups via these instructions (a NANDroid backup needs to be performed, too).

How to flash AvatarROM on Droid Bionic
- The phone and your laptop have to establish a connection, so use the USB cord of the first to make that possible, then move the packages to the SD card root of the smartphone.
- Unplug the devices, power the Droid Bionic off, enter it in Recovery Mode and operate several wiping actions; to boot the phone into the Recovery Mode:
– press + hold, together, Volume Down + Power;
– wait for the mode to appear. - Coming back to those wiping actions:
– choose Factory Reset/Wipe Data;
– confirm it with “Yes“;
– opt for Wipe Cache Partition when you’re in the phone’s Recovery Menu;
– choose Wipe Dalvik Cache. - Choose these options next: “Install zip from SD card” and afterwards “Choose zip from SD card“. Using “Power”, make sure to opt for the AvatarRom .zip archive file from before; the flashing of this file has to be confirmed, so do it and after that have patience until the smartphone is installed with this tool.
- Repeat the actions that helped the file from before be featured on the handset; this time around, opt for that Google Apps package.
- This has been everything you had to do to land those two packages on the Droid Bionic XT875. Return to the device’s Recovery Main Menu.
- When you’ve landed in that spot, do as follows: opt for the phone’s restarting. After your phone has booted into the Android 4.2.2 Jelly Bean AvatarROM build 3.1, you’re all good. To verify on the new firmware, you need to go to the “About Phone” from your handset’s “Settings”.
NOTE: Now then, you are all set for an improved Motorola Droid Bionic. However, the same device may stay blocked in “Status 7 error”. To solve the issue, you need to:
- go on a search for the kernel which is suitable for your phone;
- install it on the handset;
- reboot the phone.
Or, in case the smartphone enters a boot loop that goes on and on, you have to:
[sc name=”banner-jos”]
- operate Wipe Cache Partition;
- follow that up with Wipe Dalvik Cache;
- reboot the smartphone when you finish.
You can return to the old ROM by following these steps below:
- restart the Droid Bionic into Recovery;
- choose “Backup&Restore“;
- choose the ROM from an upcoming list.
The phone is now back to its previous ROM.


