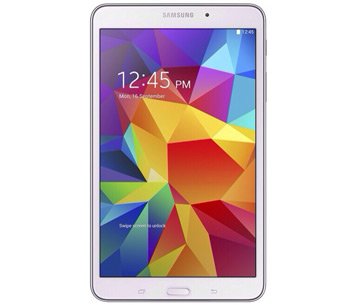
How to Update Galaxy Tab 4 7.0 SM-T230NU to KitKat 4.4.2 UEU0AND9
Galaxy Tab 4 7.0 SM-T230NU is introduced to something it hasn’t had so far. And to help with this is recent firmware UEU0AND9. To see what the latter is good for, you need to take a peek at our guide!
For the Samsung T230NU, a change is always welcome. In this case, Android 4.4.2 is the novelty to look forward to. This operating system is brought on your tablet with UEU0AND9 firmware, launched for the USA (Cellular South) last month.
Because the firmware has been unveiled for the Galaxy Tab 4 7.0 T230NU, no other gadget will work with it and get the upgrade. Once you’re aware of this, something else should be noted here: if the device is rooted, the update will damage some of its features.
The novelties
The first thing your tablet will say goodbye to is its root access. After the latter gets revoked, the gadget is going to see its system partition deleted. Nothing of the sort will happen to its internal / external SD cards and the important content shall also be spared.
The Android 4.4.2 KitKat variant has the ability to bring many goodies. They range from new features to customization options. Added to the mix are battery improvement and new apps.
Samsung’s KIES software doesn’t help with the update. Since the firmware’s KIES logo is not turned on, you can upgrade the tablet with OTA or this tutorial. Using an over-the-air (OTA) method means that stock ROM must be installed on your tablet. This is why, if your device doesn’t feature that, you can turn to our guide.
Prerequisites
Perform these requirements before updating the tablet:
- the only operating system your laptop must be installed with is Windows;
- all of the programs offering protection from security problems must be deactivated on your tablet;
- the programs which do the same for your laptop should also be deactivated;
- charge your tablet’s battery till it’s full;
- the laptop you use must have USB drivers for the Samsung SM-T230NU installed on it;
- protect the tablet’s data by generating some regular backups;
- a full NANDroid backup is also a good idea, so perform one afterwards;
- USB Debugging on your tablet must be activated.
Step by step instructions
The steps needed for a smooth update to the new firmware begin with you downloading certain packages on your laptop.
- Odin v3.09 (available here) and the are their names. As always, they feature many files which you’ll have to extract on the laptop with 7Zip. This is the one of them which should be launched on the notebook: Odin v3.09.exe.
- Restart, for the next part, your tablet in Download Mode. This certain step has to be done as shown now: press and hold Home, Power and Volume Down at the same time, then do it till you observe a boot message appearing, at which moment you need to press Volume Up.
- This being done, move on to the step that requires the use of your tablet’s USB cable. Why? Because the device and your laptop must be connected to one another.
- After they are, Odin will display this: a sign in blue. This way, the owner of the tablet knows that the connection’s been achieved.
- AP / PDA is the place where the firmware file has to be moved. Once you’re done, activate Auto Reboot, uncheck Re-partition, check F. Reset Time and make sure the new firmware begins its flashing. To see the UEU0AND9 stock firmware on the tablet, tap the option known as “Start“.
- The installation shall end once “Pass” is shown in green and the gadget begins to reboot on its own. That’s when you’re free to disconnect the Galaxy Tab 4 7.0 SM-T230NU from your other device. You have to unplug them by taking out the previously used USB cord.
- [sc name=”banner-jos”]Once the two are out of the plugging state, you can open the new firmware. This will happen after you tap two options: Settings and About Tablet.
If you want to know whether or not the novelties are what you thought they’d be, take them for a spin. In case they fail to impress you, the upgrade can be revoked and the old ROM restored. To make sure the previous ROM comes back without problems, the NANDroid backup file should be used here.
Then, if you have questions about something concerning the update, we have a comment box under this post. Be sure to use it.


