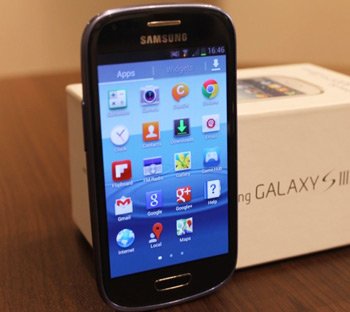
Update Galaxy S3 Mini I8190L to Android 4.1.2 UBAMH1 Official Firmware
We are happy to report that Galaxy S3 Mini I8190L will finally come your way in an updated form. All due to the fact that somewhere a Samsung developer created Android 4.1.2 UBAMH1 for your device. The exact route that your phone must take in order to be upgraded to the new Jelly Bean with the help of the indicated firmware will be explained in today’s post!
The people whose Galaxy S3 Mini I8190L will end up being updated with our guide are the ones living in these countries: Uruguay, Jamaica, Colombia and Panama (Cable & Wireless). We will talk about what you need to do if you live in one of these countries after we are done with this and the next paragraph.
For now, allow us to present some of the advantages of applying an upgrade on your handset. The battery of the phone you own will not die so quickly if you update the device to the new Jelly Bean OS; on the contrary, the battery unit is going to display a much improved performance. Likewise, you will get the best out of your smartphone with the aid of different new features, customization tweaks and apps. The entire performance delivered by your S3 Mini will make you proud!
Requirements
But what should you do to successfully have an updated smartphone? Easy: simply perform the pre-requisites and steps we plan on showing you in a very short while. First, the requirements:
- the PC or notebook you use daily must have USB drivers installed on it (make sure they are meant for your handset);
- charge the battery unit of your phone;
- be careful to have Windows on your laptop or computer instead of a different OS;
- create as many backups as you want to (include, here, the creation of a full NANDroid backup, too, following the instructions from this guide);
- turn off the security programs pre-flashed on the Galaxy S3 Mini GT-I8190L and the laptop;
- turn USB Debugging on;
- use, for this guide, the USB cord of your phone, as well.

Instructions
Then, after the guidelines above are considered, we need the following from you: go online and search for Odin tool (the file is available here) and the new Jelly Bean 4.1.2 UBAMH1 official firmware (download the Uruguay version from , the Jamaica version from , the Colombia version from and the Panama version from ) on your own notebook/PC. Both of these files are equally important, so don’t begin the update unless your I8190L has them. After it does, the tutorial can finally commence!
- Your first concern should be to go to the the packages and extract them both, then do this: boot your device in Download Mode by pressing and holding, together, Volume Down + Home + Power; when the Android logo makes an entrance, you have to press only Power.
- Then take the USB cable we mentioned and use it to create a connection between the handset and the laptop. As soon as the Odin finds the phone, it will display the following elements: a yellow ID:COM box together with an “Added!!” message.
- If they don’t pop up, you need to search for another USB port to use or install the USB drivers a second time. In case the devices are already successfully connected to one another, you can proceed to the tapping of PDA. After that, continue with these instructions: opt for a file which has CODE in the name, tap Phone, select a file with MODEM in the name, tap CSC, choose a file that has CSC in the name, tap PIT and opt for a .pit extension.
- [sc name=”banner-jos”]When the latter tasks are done, we recommend you to choose some boxes; which are Repartition, Auto Reboot and F. Reset Time. To move on, you should click on “Start” in order to have the update file installed on your smartphone.
- After waiting a bit, the Jelly Bean 4.1.2 UBAMH1 official firmware will be on your phone as soon as you see the device showing “Pass” and then restarting.
- Once the reboot is done, you need to unplug the handset from the notebook. The upgrade file is now in “About Phone” section of your device.
Now that your Galaxy S3 Mini I8190L is updated at long last, you can finally witness the pros of this procedure on your own!


