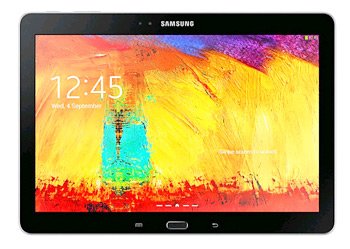
Update Galaxy Note 10.1 SM-P605 to Android 4.3 XXUBMJ9 Official Firmware
Galaxy Note 10.1 SM-P605 2014 version is the tablet that is next in line to be updated to Jelly Bean 4.3. Instead of using KIES (since the firmware has KIES logo not activated) or OTA method, we recommend our tutorial if you want your device to be upgraded smoothly and easily.
The official firmware you will install on your tablet with this guide is called like this: XXUBMJ9. Its release date was this month. The actual Galaxy Note 10.1 P605 was released in October this year.
The firmware that your gadget will soon sport works only with this particular model (otherwise its firmware shall be bricked) and you should live in one of the following countries to use it: New Zealand (Vodafone as the carrier), Portugal (with Vodafone or TPH as the tablet’s carrier), Hungary (Telenor), Slovenia (Mobitel), Slovakia, Czech republic, Italy, Greece, Switzerland, Spain, Germany, Poland, Bulgaria, Netherlands, Russia, Romania, Bulgaria (MTL as the carrier), Baltic countries, South-East Europe, Singapore (SingTel and StarHub as the device’s carrier), Malaysia, Germany (T-Mobile version), Austria, Finland, France and the UK.
A rooted SM-P605 will affect the way the update works. What we mean by that: as soon as your tablet is upgraded, its root access will be revoked and then the system partition will be deleted. Once that happens, you will see that the gadget’s internal and external SD cards won’t have the same fate.
The important data on your gadget will also remain where it is. Which is good news, as is the fact that the Android 4.3 will do wonders for the tablet: the latter will, apart from receiving the great stuff which is inside this OS, be bug-free.
Requirements
In order to be one of the many who have already updated their tablet with today’s new official firmware, you will first need to follow these requirements:
- turn on USB Debugging;
- flash USB drivers for this tablet from this page on your laptop/comp;
- create a backup (or more) and also full NANDroid backup afterwards, via these instructions;
- turn off all the security programs that are part of the tablet and the notebook/PC;
- charge the battery unit of your gadget;
- your comp or notebook must have Windows among its specs.
Instructions
- We now have to tell you the following: download, on your PC/laptop, two packages. They are Odin tool (from this location) and the Android 4.3 XXUBMJ9 stock firmware. The new ROM can be downloaded . You must choose the appropriate carrier and country to find the correct file for your device.
- As soon as your device has them stored on it, time for another step: extract the files inside the two packages on the laptop’s or comp’s desktop.
- The tablet must now enter Download Mode like this: press + hold Volume Down, Power and Home simultaneously, then let go of them once the Download Mode appears.
- The Odin tool you also downloaded on your notebook needs to be launched as Admin next. Then you should make sure there’s a connection established between your two devices; for this to work out, you have to use the USB cable which arrives with your tablet.
- Then wait until the Odin lets you know if the plugging really happened; which will be proven by a yellow-colored ID:COM box and a message that contains “Added!!“. If there’s no connection between your SM-P605 and your laptop, you had better perform one of these actions: re-flash the USB drivers or make use of a USB port that’s different to the one used thus far.
- Then you should click on PDA, choose a file that has CODE in the name, click on Phone and be sure to continue like this: choose a file with MODEM attached to its name, click on CSC, opt for a file with CSC in the name, tap PIT and opt for a file with a .pit extension.
- As soon as you complete the previous steps, yo have to opt for some boxes; these three over here: Auto Reboot, Re-partition and F. Reset Time.
- If they are all activated, you need to do as follows: tap “Start“. The new XXUBMJ9 firmware is going to go through an installation.
- [sc name=”banner-jos”]It won’t require a lot of time to end; when you see the tablet restarting and delivering a “Pass” message, the tablet will have finished the flashing of the new firmware.
- Which brings us to this last task: remove the USB cord which was keeping your two devices connected to one another. Pay a visit to Settings, tap About Tablet and the firmware will meet you there.
Experiment a bit with it and, if you enjoy it, keep enjoying it. If you don’t, though, there’s that NANDroid backup file to use with this guide so that the update is revoked and your Galaxy Note 10.1 SM-P605 returns to its old ROM.
You will see, below, a comment field. For any sort of question, leave a comment there and we’ll reply back.


