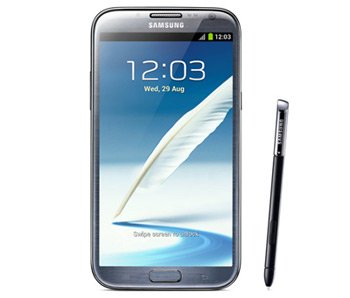
Remove KNOX and Root Galaxy Note 2 N7100 running Jelly Bean 4.3 XXUEMJ5
The tutorial we wrote especially for Galaxy Note 2 N7100 is made of two parts: the first one will contain details on how to remove KNOX from your phone and the second part will take you through the business of rooting your handset.
Keep in mind that the latter must have Android 4.3 XXUEMJ5 Jelly Bean ROM on it for the rooting to be effective.
Requirements
Here’s our requirements:
- make a backup (or more, following these instructions);
- turn off antivirus programs along with Samsung KIES present on your notebook or PC;
- flash USB drivers for this handset on your laptop;
- charge the phone’s battery unit;
- turn on USB Debugging;
- download KNOX-Disabled Bootloader (file name: ), Odin tool from here, and files on your notebook or computer.

How to disable Knox bootloader and repair Wifi problems
When the pre-requisites are no longer an issue, you can proceed to the first part of our guide.
- So, to be able to install KNOX Disabled Bootloader on your phone, you should unzip the Odin file on your laptop’s desktop, let the Knox file unzipped and then extract the WiFi Fix file (this should get you a file called patch.tar.md5).
- On to the next task: switch the handset off and enter it in Download Mode by pressing Home + Volume Down + Power at the same time, waiting until you spot a screen of warning, letting go of the buttons when you see that and pressing Volume Up.
- Next: open the Odin tool on the laptop and then plugging the handset to the PC. Odin should show you “Added!!” and a yellow ID:COM box port; if not, then you have to use another USB port or install the USB drivers again.
- Make sure you continue with these tasks: tap “PDA” in Odin, look for the MJ5BLPatch.tar.md5 file, load it in the Odin and then tap “Start”.
- Once the installation of the KNOX-Disabled Bootloader file is done, you should see a PASS message; moreover, the N7100 is going to reboot.
- Once the latter happens and a boot animation from Samsung pops up, unplug the devices from one another and wait for the phone to boot in Normal Mode.
- When the WiFi refuses to work, you need to switch the N7100 off, close the Odin tool, boot the handset in the Download Mode, open the Odin tool v3.07.exe on your laptop, plug your phone to the notebook, tap “PDA”, load the patch.tar.md5 file, then “Start” and have patience till PASS appears on the display; as soon as you see the handset reboot, you should unplug it from the laptop and close the Odin.
How to root your device
- To learn how to root your Galaxy Note 2 N7100, you have to begin by flashing a custom recovery on it.
- Then get a file called DrKetan .zip and leave it unzipped. After the phone is plugged to the laptop, do this: transfer the file you just downloaded on your notebook to the SD card root of the smartphone. Unplug the latter from the laptop and turn the phone off.
- After that, make sure you enter it in Recovery Mode by pressing and simultaneously holding Volume Up + Home + Power; in a very short while, the Recovery Mode Menu will come on-screen, so do as follows: choose Install zip from SD card and opt for Choose zip from SD card.
- Load the DrKetan_MultiTool_AdvanceV2 file and confirm its flashing. Then wait for a MultiTool Main Menu (AROME Installer) to pop up.
- Next: tap the option called Proceed with MultiTool and then tap “NEXT”. See if there’s something called Root Inject; if it’s on your screen, opt for Root Device, then tap “NEXT” and choose “Inject BusyBox to device”.
- [sc name=”banner-jos”]Now tap “NEXT” again and opt for Do Not Change. The root will then be applied; while that happens, the AROMA Installed is going to close.
- Move on by rebooting the phone from its Recovery Menu. When the handset boots in Normal Mode, refrain from opening SuperSU if it’s on your device.
- Instead, do this: go to Google Play, look for the SuperSU app, update it and have patience till the upgrade is over. Your Galaxy Note 2 N7100 is now rooted on XXUEMJ5 Jelly Bean 4.3 firmware. If you are not sure of this, use Root Checker from the same Google Play.


