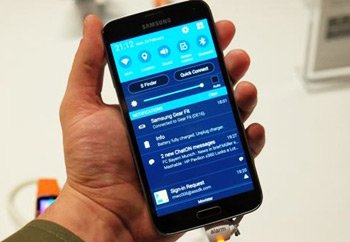
How to Install KitKat 4.4.2 UCU1ANCE on Galaxy S5 SM-G900A
Galaxy S5 SM-G900A for the USA is the smartphone which will get the hang of Android 4.4.2 KitKat in our latest guide. When you opt for this change, you should perform some steps. They are, all of them, mentioned today. So let’s find out what an upgrade should look like.
First off, the procedure is in great need of UCU1ANCE official firmware. Only when your smartphone will have it will the upgrade truly happen.
The new OS will land on your device if you’re based in the USA, use AT&T and your phone’s name is Samsung SM-G900A. The new firmware has been made especially for this model. When you upgrade another one with the this firmware, the phone or tablet will get affected.
Apart from using the device we advised, you will have to know what happens when a rooted Galaxy S5 G900A gets the new firmware. The most important part of a rooted gadget is its root access; the update will revoke that. Also, the upgrade will also damage the system partition. Nothing this bad will happen to the data. The smartphone’s both internal and external SD cards will be able to function properly even with this update file.
The latter came out this month. However, the firmware’s KIES logo doesn’t feature an activated KIES logo. Which is why you have to resort to OTA if you don’t feel like using our method. The OTA needs the presence of stock ROM to be performed.
The new KitKat OS is sought after by gadget users who want better performance and the addition of many novelties. Such as features, tweaks, features and many more.
Prerequisites
As a rule, an upgrade requires certain preparations. The ones that are meant for your handset are the following:
- a notebook with Windows needs to be used;
- a full NANDroid backup needs to be created;
- a regular set of backups must be created;
- your handset’s USB Debugging option needs to be turned on;
- prepare your laptop for the download of USB drivers that fit your Galaxy S5 SM-G900A;
- look at the phone’s battery and, if it’s empty, be sure to charge it;
- this device’s security software will have to be deactivated;
- also, make sure the phone’s own software firmware is turned off.
Step by step instructions
For every update available today, the first step everyone needs to perform is this: download certain packages on your notebook.
- For this phone, download Odin v3.09 from this page and the . Unzip, with WinRar, the two and launch, afterwards, Odin v3.09.exe on your notebook.
- The action you should perform now: enter the smartphone in Download Mode by making sure Home, Power and Volume Down are pressed and simultaneously held till you observe a boot message appear, at which moment you should press Volume Up. This will be enough to end up in the Download Mode.
- The task to come up next is this: make a connection happen between the handset and your laptop via the USB cord of the former. Then have some patience.
- The Odin will, after some minutes, show up with a sign in blue. This is the sign that tells you about the success of the plugging. The firmware file has to be taken to AP / PDA and then you should do as follows: check Auto Reboot, leave Re-partition unchecked and then activate F. Reset Time.
- You are now at that point where you can start the flashing of the UCU1ANCE on the phone. We recommend doing so by tapping “Start“.
- As soon as approximately 15 minutes are over, the device is going to tell you that the update’s been performed. You will know that via a message in green and the rebooting of your handset. That message will say “Pass“. At the end of the procedure, you will have to take out the USB cord so that no connection is possible between your two devices.
- [sc name=”banner-jos”]Tap Settings on your Galaxy S5 SM-G900A and then tap About Phone. This way, the new OS and its firmware will become available for you to enjoy.
If, once using the Android 4.4.2 UCU1ANCE, you don’t like it very much, you can choose to have the old ROM restored. Which is something the NANDroid backup file will help you with.
Should you want to comment on something or leave questions, you can do that by using our comment section below.


