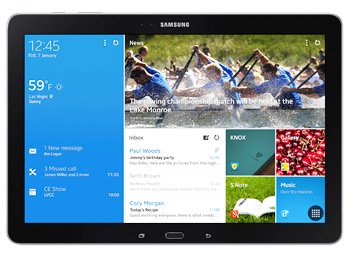
How to Flash Kit Kat 4.4.2 UEU1ANC5 on Galaxy Note Pro 12.2 SM-P900
Galaxy Note Pro 12.2 SM-P900 is featured today because you can update it to KitKat 4.4.2 from Google. America (Cellular South) is the very first country to get the upgrade. Everything you want to know about the do’s and don’ts of this process are revealed in this tutorial.
UEU1ANC5 is the means of updating your Samsung SM-P900. It’s been launched in April this year for your tablet model, so don’t install this firmware on a different version. When the update’s on your gadget, the new firmware will make sure the device’s performance is greatly improved. Among the other novelties this OS is responsible with are new features and customization tweaks. The fact that there are no bugs but instead you’ll get new apps makes the upgrade even more important.
There’s a deactivated KIES logo on this official firmware. Using KIES software from Samsung is, thus, not indicated. What you can use is OTA or this tutorial. For the former, the tablet will have to be pre-installed with stock ROM.
A tablet which has just been rooted (or features root access from a long time ago) will face some drawbacks from the upgrade. These cons have to do with your tablet’s root access, which will be revoked, and with the system partition. The latter is going to be erased from the gadget. No harm will, however, be done to the internal and external SD cards of your Galaxy Pro 12.2 SM-P900. Likewise, the tablet’s data will be saved from harm.
Prerequisites
When performing an update, the owner of a certain device has to go through requirements. The ones to be performed here are these:
- the battery installed on the tablet has to be charged 100%;
- disable the notebook’s pre-flashed security solutions;
- the security software that comes with your tablet must be deactivated, as well;
- make sure there are backups made to salvage the tablet’s content if the update doesn’t go well;
- create a full NADroid backup using these step by step instructions;
- Linux or Mac shouldn’t run on your notebook, only Windows should;
- go to this address and look for USB drivers fit for the tablet;
- download them on the notebook;
- enable, on the Galaxy Note Pro 12.2 SM-P900, USB Debugging.
Step by step instructions
- To make sure everything goes as intended, the first step to follow tells you to go to your laptop. Then download on it, from this place, Odin v3.09. After that, find the here and download it on the same device as required for the first package.
- Extract both of them next, then open Odin v3.09.exe on the laptop before you enter the tablet in Download Mode. For the booting to be successful, you need to do this: simultaneously press and hold the keys called Home, Power and Volume Down, release them as soon as a boot message is on the display, then press only Volume Up.
- Next, take the tablet’s USB cable to make sure the Galaxy Note Pro 12.2 SM-P900 gets attached to the laptop. When the Odin shows up with a blue sign, the devices will have entered into a connection.
- After it has, add the firmware file to AP / PDA. Time for the checking of the boxes labelled F. Reset Time and Auto Reboot (in case Re-partition is checked beforehand, you should uncheck it first, then move on).
- The update file will become part of your tablet as soon as it begins an installation phase. Which has to be done like this: tap “Start“. That’s all you need to do.
- From here on, the installation will run its course for about 15 minutes until two things happen. The first of them: the tablet is going to have a message saying “Pass” in a green-colored background.
- The second sign of a completed flashing: the gadget will soon restart. If you see it do both things, then it’s a good idea to remove the USB cable so that the devices can be unplugged from one another.
- [sc name=”banner-jos”]To open the new OS and delve into its great novelties, tap the following: Settings and after that About Tablet.
If the Android 4.4.2 KitKat UEU1ANC5 is nothing like you expected, the previous ROM will have to be restored.
For this step to begin, use the NANDroid backup file. Once your tablet gets the old ROM, it will have its update revoked.
Comments and questions are welcome! Leave them in the section below.


