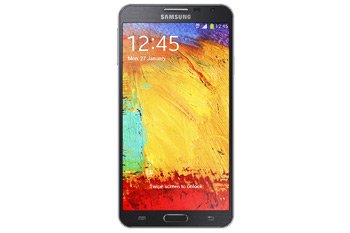
How to Flash Android 4.3 XXUANAD on Galaxy Note 3 Lite SM-N750
Installing XXUANAD on your Galaxy Note 2 Lite SM-N750 is a very good idea. The reason: your handset will be updated to Android 4.3.
XXUANAD official firmware came out this month for Russia, Saudi Arabia, Uzbekistan and Kazakhstan. The most important thing is that you flash this firmware only on the Galaxy Note 2 Lite SM-N750. If your device is a completely different model, you will brick it if you follow this guide.
Speaking of which: the upgrade can be performed via two methods. So, if you don’t want to install the new firmware with our tutorial, you can use OTA instead. Since the KIES logo is not activated, the OTA will come in handy; but only if the smartphone comes with an already installed stock ROM.
An update performed on a rooted Galaxy Note 3 N750 will result in the following: an erased system partition and a revoked root access. The upside to this: you won’t lose your device’s important data or internal/external SD cards.
The goodies belonging to the Jelly Bean 4.3 are these: several customization and battery tweaks as well as new apps and features. Together, all of these novelties will greatly improve the way your device performs and how much its battery lasts. The OS in questions doesn’t come with major bugs.
Prerequisites
Let’s move next to these requirements:
- only Windows is accepted as an operating system for your laptop;
- create a standard backup;
- download USB drivers on your notebook (they must be compatible with the handset);
- the battery of your Galaxy Note 3 Lite SM-N750 must be charged;
- make a full NANDroid backup using these instructions;
- enable, on your handset, USB Debugging;
- deactivate the laptop’s security options and then the handset’s.
Step by step instructions
So that was what you needed to do before the actual upgrade. Now you should begin this tutorial.
- The first task to perform sounds like this: download Odin from this page and the Jelly Bean 4.3 XXUANAD on your laptop. You can also get the version , for and . To extract them afterwards, all you need to use is either 7Zip or WinRar.
- After the unzipping is achieved, time for this: boot the phone in Download Mode. To perform that, you should press and hold down these buttons at the same time: Volume Down, Home and Power; continue with this: press Volume Up once you spot a screen with a warning.
- The Odin.exe from before must now be launched on the notebook as Admin. Now help yourselves with the USB cable of your handset to establish a connection between the laptop and the Galaxy Note 3 Lite SM-N750.
- What happens when the screen doesn’t come up with an ID:COM box in yellow and a message saying “Added!!”? If the connection hasn’t happened, you should try and flash, again, the USB drivers on your laptop. In case this doesn’t work, then use another USB port.
- If you didn’t experience drawbacks with the plugging, then tap BL, opt for a file with BL in the name, click on AP, opt for a file with AP in the name, tap CP, then opt for a file with CP in its name, tap CSC, choose a file which has CSC in the name, tap PIT and at the end choose a file with an extension called .pit.
- As for the following step, you will have to proceed as such: click on “Start” as soon as you are done activating the boxes labelled F. Reset Time, Auto Reboot and Re-partition.
- Once “Start” is clicked on as instructed, the new firmware is going to begin the flashing phase that will make it end up on your smartphone. Which is why you will need to have some patience until the installation’s done.
- Once several minutes have passed and you see the handset reboot and display “Pass” in all-green, do this: remove the USB cord. This way, the phone and your laptop won’t be connected to each other.
- [sc name=”banner-jos”]When you’re done with this final task, go on by discovering the goodies that come with the new OS. Finding the XXUANAD isn’t hard to do. Simply make sure you tap About Phone after you tap Settings.
If you open the new firmware, experiment with it a little and you don’t like it, return to the NANDroid backup file. We told you to create a full NANDroid backup because it would help restore the previous ROM. So go and use it. The update procedure will, naturally, be revoked after you do as such.
Drop us comments and ask us questions via the comment field below.


