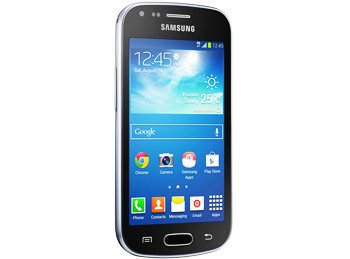
How to Install Android 4.2.2 XXUBNB1 on Galaxy Trend Plus GT-S7580
Galaxy Trend Plus GT-S7580 is geared towards all sorts of novelties. They will land on it as soon as you perform an update using special firmware we’ll discuss below.
If your Galaxy Trend Plus hasn’t experienced Android 4.2.2 yet, an update will make sure it happens. For this procedure, XXUBNB1 is the best official firmware to use. It was launched last month for Spain (Movistar) and it must be used only for the smartphone version we told you about. You will end up with a bricked device if it isn’t the model we recommended.
The novelties
When the XXUBNB1 is installed on a rooted handset, the latter will come across certain damage. Root access is going to be revoked and the phone’s very own system partition shall be deleted. Your device won’t lose its internal and external SD cards and the most crucial data will not be affected.
What does an update actually do? It brings many possibilities to have your phone improved. Here is what the Android 4.2.2 JB is famous for: a USB debug white-list and a new set of sounds for wireless charging. The Galaxy Trend S7580 is going to feature customization tweaks and low battery bug fixes, as well. The new OS version will also deliver a new Gallery app and a new set of download notifications. The Bluetooth audio streaming feature is improved and you can long-press the WiFi Bluetooth icons in Quick Settings in order to be able to toggle the on/off state. 
Prerequisites
Quick tip: to enjoy the update as quickly as possible, perform some requirements. They are as follows:
- preserve data via backups;
- create a full NANDroid backup as soon as you’re done with a standard one;
- it’s best to download, from this location, USB drivers on the laptop (they must be compatible with the phone you’re using);
- deactivate, while performing the procedure, your handset’s and notebook’s security software;
- the Samsung GT-S7580 must have a full battery;
- turn USB Debugging on;
- Windows operating on your notebook is a good idea.
Step by step instructions
This upgrade needs a couple of files to be found online and then downloaded/saved on your laptop.
- So go to this place and , then go here and get Odin v3.09. Once these compulsory packages are safely downloaded on the notebook, you have to extract them both. We suggest using WinRar or WinZip.
- Then, once the unzipping’s completed, see if a file called Odin v3.09.exe is on your laptop; if it is, open it on the latter.
- The next set of tasks looks like this: after the phone is entered into Download Mode, you should plug it to the notebook. To boot the handset in that particular mode, do this: press and hold Home, Power and Volume Down at the same time, after which wait for a screen with a boot message to come up; when it pops up, release the keys you’ve been pressing and holding, then press Volume Up.
- For the plugging your handset to your notebook part, we recommend doing it by way of the phone’s USB cord. Odin will shortly appear with a blue sign on the screen. Which signifies that a successful connection has been established.
- You can do the following next: add the firmware file to AP / PDA and then have patience for a couple of minutes. Very soon, some boxes with some names next to them will appear.
- The ones to check are F. Reset Time and Auto Reboot. The one to uncheck is Re-partition. As soon as you’ve ticked the appropriate boxes, go on and tap “Start” to actually begin the process of installation.
- The new firmware will need around 12 minutes to land on your Samsung S7580, after which the latter will deliver this message: “Pass“.
- Once you see that come up in green, time for a last step: unplug, after the phone reboots, the GT-S7580 from your laptop by making sure the USB cable is no longer connected to your devices.
- [sc name=”banner-jos”]Now for the most pleasant part: explore the firmware that’s just been flashed on your phone. Do it by tapping Settings, then tap About Phone. The XXUBNB1 will come up on the screen. Explore it!
At any time during the exploration of the new firmware, you may experience dissatisfaction with it. If that goes on, the NANDroid backup file will restore the old ROM.
For questions, comments and so on, please use the section underneath this post.


