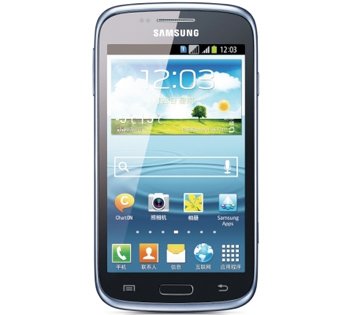
How to Flash Android 4.1.2 ZHAML1 on Galaxy Core GT-I8262
Galaxy Core GT-I8262 is with us today for a guide on how to update it to Android 4.1.2. The procedure contains new firmware ZHAML1 and we’ll tell you how to use it.
This official firmware, despite coming out last month, is great for your smartphone. It was launched for Hong Kong and it has an activated KIES logo. More on that later. For now, you should know that this tutorial and firmware are compatible only with the Galaxy Core I8262. Using a model that isn’t this one will damage it.
Here is what it means to have a KIES logo which is turned on: you can update the device with the KIES software. But only if the smartphone’s already featuring a stock ROM.
If the Galaxy Core GT-I8262 contains root access, after the update it won’t. The system partition will also be affected: the new firmware will erase it. Your smartphone will get to keep its important content as well as its internal and external SD cards.
The features which come with the new firmware will help the handset perform better. Here is what you’ll be up against: pop up play, a fixed frame of 60 fps, mini apps and a new keyboard. Extended Vsync timing, automatic adjustment for the size of widgets, sync and connect email updates, group cast and Google Now are also on the list. As are all share, free style widget, triple buffering and touch anticipation. The update won’t bring security threats.
Prerequisites
All of the goodies that become available with an upgrade require some preparations. They are called requirements and look like this:
- only Windows should be running on the laptop;
- here are the USB drivers which are suitable for the handset;
- download them on the notebook;
- turn off all of your handset’s security solutions;
- after you make a regular backup you should include a full NANDroid one;
- the security software running on the laptop must also be deactivated;
- the battery of your smartphone must be charged;
- turn on USB Debugging.
Step by step instructions
These pre-requisites should be followed by the steps needed for an update.
- The first one tells you to download Odin and then the on your notebook. The version for your country is available from here.
- If you are done with this step, we have another one for you: extract the files that are inside the packages after you’ve saved them on the notebook.
- Follow this step by doing the following: boot the Galaxy Core GT-I8262 in Download Mode. For this you have to press and hold down, at the same time, Volume Down, Home and Power, let go of these keys after a boot screen welcomes you, after which you should do this: press Volume Up.
- You should now proceed to launching, on your laptop, the Odin as an Admin.
- Afterwards, be sure to plug the smartphone to the laptop with the former’s USB cable. The end of the plugging will happen when “Added!!” and a yellow ID:COM box pop up on the screen.
- If they do, the connection was successful. Should they not appear, try using another USB port or making sure the USB drivers are flashed on your laptop once again.
- Go on by tapping BL, opting for a file with BL in the name, clicking on AP and then doing this: choose a file with AP in the name, tap CP, opt for a file with CP in its name, tap CSC, choose a file which has CSC in the name, tap PIT and opt for a file that will have an extension with .pit in it.
- Once you’re done with these instructions, all you have to do is tap these boxes: Auto Reboot, Re-partition and F. Reset Time. The new firmware will then have to be flashed on the handset.
- [sc name=”banner-jos”]To begin its flashing, we recommend tapping “Start” and then waiting. The fact that your device will restart soon and “Pass” will come up should tell you that the new firmware is now running on the Galaxy Core GT-I8262.
- As such, go ahead and unplug the handset from the laptop. Then do this: tap Settings, tap About Phone and discover the benefits of the new ZHAML1 for your handset.
If something’s wrong with this firmware and you want the old one back: use the NANDroid backup file. It may revoke the upgrade, but you’ll have the previous ROM back.
For comments and questions kindly use the section under this tutorial.


