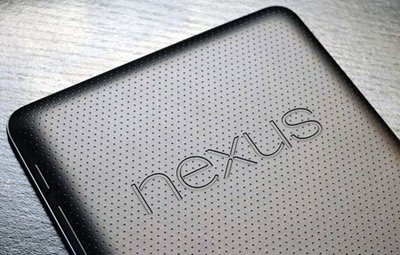
Update Nexus 7 3G to CyanogenMod 10.1 RC5 Jelly Bean 4.2.2 custom ROM
The smartphone we want to install CM10.1 RC5 today is Nexus 7 3G. There seems to be a shortage on tutorials on this matter, so we decided to step in and lend a helping hand. Especially if you own this model.
The developers which created the CyanogenMod, or CM in short, have been working hard on a tool to use on the Nexus 7 3G. When they came with the CyanogenMod 10.1 RC5, it was decided that it would fit that device perfectly. And it does, because we tested it ourselves not too long ago.
Once the guide here is over, your tablet is going to display an improved performance. Not that it behaved badly in the past, but it shall be faster, much more stabler and so on. The features that come with this tool are based on what Android 4.2.2 JB delivers.
Requirements
The flashing of the CM10.1 RC5 may end up in a damaged Nexus 7 3G. To avoid that, follow our tutorial’s steps accordingly. And first observe these pre-requisites:
- make a backup that must include the important content on your tablet;
- charge the gadget’s battery.

How to flash CM10.1 RC10 JB 4.2.2 on Nexus 7
- Let’s start the guide. The first move you are asked to perform sounds like this: download the and then Google Apps (you must select the archive labelled gapps-jb-20130301-signed.zip) on a notebook.
- Go to the USB cord that comes with the tablet and use it to connect the device to your laptop, then copy and paste the two zip files from the laptop to the Nexus 7 3G’s SD card. Wait a bit, then do the following: unplug the tablet from the PC.
- After that is done, your next task is this one: boot the gadget into Recovery Mode once the former is no longer powered on.
- To enter the device in the Mode you need, press and hold Volume Up, Home and Power at the same time; the display of the tablet will flash soon, so you need to stop pressing and holding those keys and instead focus on making a NANDroid backup next; this sort of an operation should be performed by taking the following route: choose Backup & Restore, opt for Backup and wait for the process to start and then to finish.
- Return to the tablet’s Recovery Menu, because you will now have to wipe the system of your Nexus 7 3G. Like this:
– opt for Factory Reset/Wipe Data;
– choose Yes;
– wait for the action to happen;
– choose Wipe Cache Partition when you’re in the Recovery menu again;
– opt for Wipe Dalvik Cache. - [sc name=”banner-jos”]The CM10.1 RC5 should be installed by doing as follows: choose Install zip from SD card, afterwards Choose zip from SD card and then opt for the zip file with Power.
- A confirmation of the flashing is required, so do that and wait for the process to be over before you flash the gapps-jb-20130301-signed.zip by repeating all of the actions starting from this part: “by doing as follows: choose Install zip from SD card (…)”.
- Return to the Recovery Menu of your tablet. When you’ve landed in that spot, choose the tablet’s restarting option. The Nexus 7 3G will be the proud owner of the Jelly Bean 4.2.2 CyanogenMod 10.1 RC5 custom firmware from now on. Use it wisely folks!


