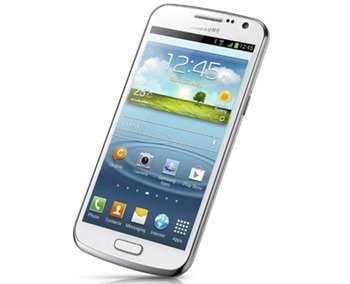
Update Galaxy Premier GT-I9268 to Android 4.1.2 ZMBMH1 Official Firmware
Galaxy Premier I9268, launched in February this year, is present in this tutorial because we have Android 4.1.2 ZMBMH1 official firmware to flash on your phone. This tool was released in August 2013 and it features an activated KIES logo. Find out more about it below.
The tutorial you are about to be exposed to must only be followed if you use the Galaxy Premier GT-I9268. If you update another phone, its firmware will be bricked. A couple of info about the official firmware we are using: with it installed, your handset will have its battery life last more, it will have new apps to experience, tweaks will make it easy to personalize and so on.
The number of new features you will see on your phone after the update is very generous, too. Your Galaxy Premier GT-I9268 shall be more stable and the performance will be enhanced as a result; so will your phone’s speed.
The fact that the new firmware has its KIES activated is very important: thanks to this, you will be able to upgrade your handset not only with this guide, but also via Samsung’s KIES software if you feel like.
In case the smartphone you own is rooted, the Android 4.1.2 ZMBMH1 will revoke the device’s root access. And the system partition will be erased once the upgrade has been achieved. The internal and external SD cards will not be affected. Even so, don’t worry too much: the important files on your smartphone will not be deleted.
Our update tutorial is also recommended to people who can’t look for an update via the KIES or via an OTA (with the Software Update button under Settings menu) method. If you want to, you can make use of the Samsung KIES and look for the necessary update on your own.
Requirements
The update is now easy to perform. Before we give you the necessary steps, let’s look at the following pre-requisites:
- use only a PC or a notebook that deals with Windows;
- be careful to turn off all of the security programs on this laptop or comp and the phone;
- charge your handset’s battery unit;
- create a standard and a full NANDroid backup (using this tutorial);
- turn USB Debugging on;
- install from this page on your notebook, only those USB drivers which work with the handset;
- always keep the phone’s USB cord close by.

Instructions
- Because the list of requirements is now complete, you can go on and download these files on the laptop: Odin 3.07. exe from this page and the new Jelly Bean 4.1.2 stock firmware from . These packages come pre-loaded with many files; these files must be a part of your notebook, so unzip the two.
- Make sure they land on the PC’s desktop, then do this: boot your Samsung I9268 in Download Mode by pressing and holding Volume Down + Home + Power, let go and press Volume Up when Android’s logo appears.
- You should do as follows next: open the Odin. Then make sure the handset is connected to the laptop via the USB cord. The only way this connection will work is if you see a yellow ID:COM box together with this message: “Added!!”. If no such thing appears on the screen, you should use another USB port; or try installing, again, the USB drivers.
- Here is what we ask you to do after the plugging is successful: click on PDA, find a file with CODE and opt for it, tap Phone, locate a file with MODEM in the name and select it, click on CSC, search for a file with CSC in the name, tap PIT and choose a file whose extension should be .pit.
- Now check Re-partition, F. Reset Time and Auto Reboot boxes. After applying this step, you should move on by tapping “Start” and then waiting for the flashing of the new firmware to begin.
- [sc name=”banner-jos”]Once the procedure ends, you should see a “Pass” message and the handset restarting; also look for a home screen to appear. If all of the stuff described just now happens, you are free to enjoy the update file after you disconnect the two devices from each other.
Go over to Settings, choose About Phone and you will see the Jelly Bean 4.1.2 ZMBMH1 on your Galaxy Premier GT-I9268.
In case you prefer the old ROM, our advice is this: revoke the upgrade process by using the backup file that resulted after you created that NANDroid backup. Then, if you happen to come across various issues during the update, leave a comment in the field below!


