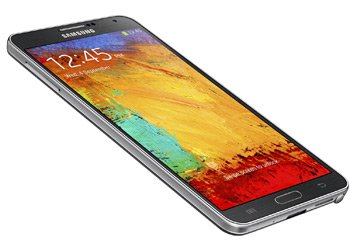
How to Update Galaxy Note 3 SM-N9005 to Android 4.3 VJUDMJ7
Galaxy Note 3 SM-N9005 is, today, the smartphone which will receive an upgrade. And not just any upgrade: your device will have Android 4.3, the latest variant, as soon as you’re done with this guide.
This tutorial is for those of you who live in Chile and Brazil and use one of these carriers for your phone: Telefonica, Claro or Entel PCS for the Chile region and Claro, OI and TIM for the Brazil one. The official firmware we opted for to aid us today is Jelly Bean 4.3 VJUDMJ7. While the new firmware was released last month for Brazil, the version for Chile came out this month. However, each of these variants comes with an activated KIES logo. So you can use Samsung’s KIES software for this upgrade. But if you do that, you should check whether your handset has a stock ROM running on it; if it doesn’t, use our tutorial instead.
You will end up with a bricked smartphone if it isn’t the Galaxy Note 3 SM-N9005. In order to know what you’re up against should you have a rooted device: your smartphone will, after the update, experience a deleted system partition and a revoked root access. The device’s important data won’t be affected by the upgrade and neither will the internal and external SD cards.
The VJUDMJ7 has these novelties to boast about: new features, a great performance due to the many tweaks and options, enhanced battery life thanks to loads of numerous tweaks as well as new apps, plenty of customization options and many more. You will also notice a lack of bugs. 
Prerequisites
Let’s take a look at these compulsory requirements:
- to make sure the battery doesn’t die on you, charge it before you begin the guide;
- enable, on the Galaxy Note 3 N9005, USB Debugging;
- security programs shouldn’t be running on your smartphone and notebook while the update is taking place, so disable them;
- make a regular backup, using this tutorial;
- when you’re finished, create a full NANDroid backup via these tips;
- install, on your laptop, USB drivers which are available for your handset;
- only a Windows-operated laptop should be used.
Step by step instructions
- When you’re done with them, be sure to check out our first step for today: download Odin and the Jelly Bean 4.3 VJUDMJ7 on the notebook. you will find the Chile Telefonica version while you will find the Chile Claro variant. To download the Chile Entel PCS version, ; for the Brazil Claro variant . Other available versions are: and .
- If both download have ended, you should boot the handset in Download Mode; the way to do it is by following these instructions: press and hold Home, Volume Down and Power simultaneously and then press Volume Up once the screen shows up with a screen of warning.
- You should then move on to this step telling you to launch the Odin as Admin on your laptop and plug, with the handset’s USB cord, the Samsung SM-N9005 to the notebook. A connection is going to be established soon afterwards and you will come across “Added!!”.
- Apart from that, you should also see a yellow ID:COM box. But in case a failed plugging happens, time for drastic measures: use another USB port or install the USB drivers again.
- You will then be able to tap, for the following step, BL, select a file with BL in the name and then do the following: click on AP, opt for a file with AP in the name, tap CP, opt for a file with CP in its name, tap CSC, choose a file which has CSC in the name, tap PIT and choose a file with an extension called .pit.
- Activate, next up, this group of important boxes: F. Reset Time, Auto Reboot and Re-partition. After this, we suggest the following action: tap “Start” to allow for the start of the flashing phase.
- [sc name=”banner-jos”]Which will be over after the handset restarts and displays “Pass”. Now you can do this: remove the USB cable. After the devices are not connected to one another, you should tap Settings, then click on About Phone and locate the new firmware on your N9005.
When you lock eyes on it, use it for a bit. If it feels wrong, you should go to where you have the NANDroid backup file. To restore the phone’s old ROM, you need to use this file. If you do, the update procedure will be revoked.
All your questions and comments will be addressed if you drop them in the section below!


