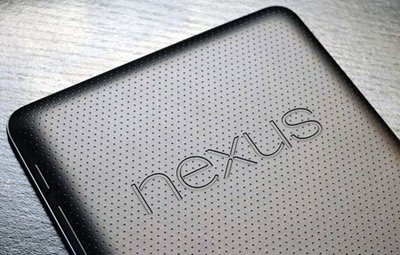
Root Nexus 7 2013 on KitKat 4.4 KRT16O and flash CWM Recovery
Should you happen to work with Nexus 7 (the 2013 edition) on daily basis, rooting it will mean the world to how your tablet performs. As will flashing it with a custom recovery.
For the tutorial we have in mind for today’s post, your Asus Nexus 7 needs to run Android 4.4 KRT16O KitKat official firmware. It your gadget happens to run any other firmware, our rooting guide will be meaningless. If you don’t want this scenario to happen, make sure the right custom ROMs is on it. If we made that clear, let’s go through the advantages of owning a rooted device.
We’ll start with these elements: the possibility to have full access to your gadget’s system, the ability to look for root-only apps and install them on this device, work with a battery that is capable of lasting many more hours, a performance worthy of praise and so on. With a rooted tablet, you will also get access to multiple new features that will improve the performance of your tablet.
Requirements
If your device already has the Android 4.4 KRT16O KitKat custom firmware, the only other requirements to fulfill are given below:
- download , and on your laptop;
- create a backup (or a couple of them);
- turn USB Debugging on;
- get USB drivers that are good for your tablet from here on your notebook;
- charge the tablet’s battery to its fullest;
- use a factory unlocked Nexus 7 2013.

Instructions
- The guide we created for you and your tablet can now commence. We give you its first task that requires completion: once you’ve downloaded the Fastboot on your comp or laptop, you must absolutely unzip it in a directory which is called android-sdk-windowsplatform-tools (in case you don’t see this folder anywhere, you can make it manually).
- Now, since the SuperSU v1.69 is also on your notebook, you have to make sure you do this: transfer it to the tablet’s SD card root and then be sure to power the tablet off.
- Move on to this next step after you are done with the other one: download CWM Recovery from here, after which move this one to the directory named android-sdk-windowsplatform-tools.
- Then enter your Nexus 7 2013 into Fastboot Mode by following this instructions: press and simultaneously hold the buttons for Volume Down and Power.
- Do that and soon you should come across a text on the tablet’s display; you are now in Bootloader Mode and you can next go to the android-sdk-windowsplatform-tools directory.
- Then launch a Command Prompt like this: press Shift and right-click on Open Command Prompt. Now be sure to enter “fastboot flash recovery recovery-clockwork-touch-(version-name-here).flo-img“. Then press “Enter” and continue by opting, from the Fastboot Menu, the option known as “Recovery”.
- Move on to the next important step, which is this one: enter the tablet into Recovery Mode and after that choose Install zip from SD card with “Power” and do the same for the option named Choose zip from SD card.
- [sc name=”banner-jos”]For now, you have to do as follows: choose the SuperSU-v1.69 .zip archive with the help of the button for “Power”. To get to this file, you need to use the keys for Volume; after reaching it and selecting it, you can finally confirm the flashing.
- Then wait a bit till the installation is all done before you can move on to this task: select +++Go Back+++. Your Google Nexus 7 must now restart, so do this by opening the Recovery Menu and then choosing for the appropriate option from there.
- With this step, you are now in possession of a rooted tablet that also sports a custom recovery. To see if the root file is truly on your gadget, you should use Root Checker or look for an app called SuperSU in the tablet’s list of apps.
With such a rooted gadget on your hands, no one is stopping you from having a go at it as soon as you want to.


