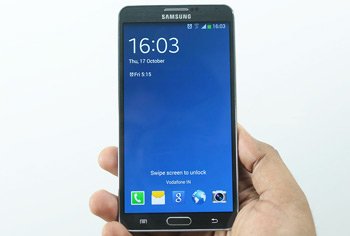
How to Install Android 4.3 XXUANB4 on Galaxy Note 3 Lite SM-N7505
Galaxy Note 3 Lite SM-N7505 will, once more, receive an update. But different official firmware will be installed on it. Find out more in today’s post!
This month saw many firmwares being released. One of them is XXUANB4, which works best with your Galaxy Note 3 Lite SM-N7505. The update consists in Android 4.3. Here are the regions whose gadget users, in particular the one we mentioned, can already upgrade this smartphone to the new OS: Slovakia and the Baltic region .
If you’re not using this model, you will brick your other device. In case your smartphone’s rooted already, the update is going to wipe its root access away. And it will erase its system partition, too. Your smartphone will not, however, end up with damaged internal/external SD cards. The important data won’t be affected.
For the upgrade, you can always use OTA if you want to. But your phone must be running stock ROM. Using our tutorial doesn’t require that.
An updated Galaxy Note 3 SM-N7505 is a device with a great deal of new goodies. They are the following: a new batch of applications, new tweaks to customize the handset and new features. If you update your device, you’ll also enjoy a much improved battery. And you won’t come across nasty bugs.
Prerequisites
For our guide you will need to consider these pre-requisites first:
- be sure to turn on USB Debugging on your phone;
- make a full NANDroid backup with this tutorial when you’re done creating a standard one;
- download, from this address, USB drivers on your laptop;
- the battery unit of your phone must be fully charged;
- your notebook should feature Windows by default;
- the security software sported by your phone must be disabled;
- turn off the notebook’s own security software.
Step by step instructions
There’s a very important first step coming your way.
- Which is this one: go to this address and download on your laptop, then and find the same version, but for the Baltic region instead. Another file should then be downloaded on the same device: Odin (which is available here). If all the necessary downloads are done, save the same files, then extract them with one of these: 7Zip, WinRar or WinZip.
- The step that should come up next requires you to enter your Samsung N7505 into Download Mode. For this, press and simultaneously hold Volume Down, Home and Power, wait for a boot screen to pop up and press Volume Up after you notice it.
- The Odin you downloaded must be launched on your laptop as Admin. This is something that will happen after you right-click on the file with a .exe in it, then select the option named “Run as Administrator“.
- This next step needs you to use the phone’s USB cable. Why? Because a connection must be established among your Galaxy Note 3 SM-N7505 and your notebook. The plugging is going to work if you see an ID:COM box in yellow along with this message: “Added!!‘.
- If no such things appears on the display, you need to opt for a second re-installation of the USB drivers on the laptop. In case this is also unsuccessful, do this instead: go to a different USB port.
- Here’s what’s in store for the next couple of minutes: tap BL, opt for a file with BL in the name, click on AP, opt for a file with AP in the name, tap CP, then opt for a file with CP in its name, tap CSC, choose a file which has CSC in the name, tap PIT and, as soon as this is done, opt for a file with .pit contained in its name.
- Very soon you shall observe a couple of boxes on the screen. From among them, only these must be checked: Auto Reboot, Re-partition and F. Reset Time.
- Now don’t forget to begin the new firmware’s flashing. This step requires you to click on “Start” and step aside while the installation goes on.
- [sc name=”banner-jos”]When no more than 19 minutes have passed, the Galaxy Note 3 Lite SM-N7505 shall automatically restart; you need to wait for “Pass” to be written on the screen. When this message pops up in green: disconnect the smartphone from your laptop, tap Settings, tap About Phone and gain access to the new XXUANB4.
In case of problems with this firmware, select the NANDroid backup file. This action shall bring the old ROM back on your handset by revoking the update.
Do you have a burning question to ask us? Please use the box below! Same goes for comments.


