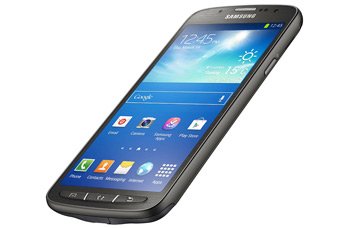
How to Install Android 4.3 UBUBND3 on Galaxy S4 Active SGH-I537
Galaxy S4 Active (AT&T) SGH-I537 will make you want to use it more after an update is performed. The pros that come with such a procedure are always great. But only if your phone runs certain firmware.
The firmware we found for your device goes by the name of Android 4.3 Jelly Bean UBUBND3 official firmware. It is specially created for the Galaxy S4 Active SGH-I537 used by our Mexican readers. Check the carrier you use with your phone; if it’s Telcel, you can get the new firmware on it. If you’re not using this particular handset, you should upgrade your device with another guide; ours will brick it.
The improvements
Your smartphone can try Samsung’s KIES as an update method. This option should only be used by those of you whose handset has stock ROM. For the rest of you who don’t, our guide works without this tool.
Immediately after it’s updated, the phone is going to meet new stuff. For example: batter improvement via tweaks that help it last more than it usually does. Also, the smartphone will have new apps and you’ll easily be able to personalize it. New features are present, too.
When the upgrade meets root access on its way, that access will be revoked from your phone. The same will happen to the system partition, which will end up deleted from the handset. The internal and external SD cards on the Galaxy S4 Active I537 will not receive damage; neither will important data.
Prerequisites
Find below the requirements that must be performed before the update:
- regular backups are needed to protect the phone’s data;
- make sure a full NANDroid backup follows the standard one above;
- charge the Samsung I537;
- Windows must be the OS variant running on the laptop;
- download, from this address, USB drivers on your laptop;
- turn off the security programs installed on the smartphone;
- deactivate the security programs installed on the laptop;
- your handset’s USB Debugging should be turned on for this update.
Step by step instructions
The smartphone is now waiting for the Android 4.3 JB UBUBND3 firmware.
- Download it on the laptop (file name: I537UBUBND3_I537TCEBND3_TCE.zip), Then download, on the same laptop, this file: Odin v3.09. What you downloaded just now, both packages, must be unzipped.
- The tool of choice you can use here is one of these: 7Zip or WinRar. When the Odin v3.09 has just been extracted, choose Odin v3.09.exe from among the multitude of files and launch it on your laptop.
- Your next move is this: boot the smartphone in Download Mode. This step requires you to press and simultaneously hold Home, Power and Volume Down first. Once you see a message containing a boot warning, press Volume Up.
- You have to continue with the plugging of your devices to each other. This connection is established with the handset’s included USB cord.
- After being used for this step, you should have a little bit of patience. The Odin is going to quickly look for the device; when it locates it, a blue sign will appear.
- After the connection’s been generated between the laptop and your phone, you can move on with the upgrade. This is how: add the firmware file to AP / PDA and check F. Reset Time. The action that comes up next is this: check Auto Reboot and then uncheck Re-partition.
- This should be followed by the step that actually starts the upgrade. So make sure “Start“ is tapped. After this, watch and wait until the installation of the update firmware is over.
- You will find out if the firmware is flashed once the smartphone gets a “Pass” message and starts again afterwards.
- [sc name=”banner-jos”]You now have only one step to perform. And that is as follows: disconnect the smartphone from the laptop. The USB cable has to be removed for this last step.
When you’re done with the latter, feel free to open the new firmware. Do so by tapping these two options: Settings and About Phone. The Android 4.3 UBUBND3 will now give you access to the novelties that improve your device.
If you don’t like them, you can restore the old ROM on your Samsung SGH-I537. This is helped by that NANDroid backup file we told you about. By using this option, the handset will lose the upgrade.
For questions about the procedure, use our comment box below.


