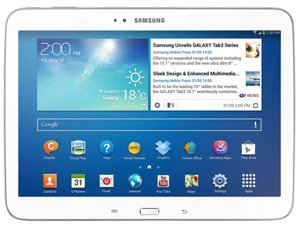
Install Android 4.2.2 ZHUANA1 on Galaxy Tab 3 10.1 GT-P5210
The star of this post is Galaxy Tab 3 10.1 GT-P5210. This tablet can finally be upgraded, with ZHUANA1 for Hong Kong, to Android 4.2.2. The most important thing is to follow our tutorial if you want this OS on your gadget!
This official firmware should only be installed on the Galaxy Tab 3 10.1 P5210. Another gadget, if updated via this post, is going to be bricked.
If you’re sure you’re using the right model, but it’s rooted, here is what you’ll have to go through: your gadget’s root access shall be revoked. The important data won’t be deleted and neither will the internal and external SD cards. But the system partition will.
In case the latter doesn’t bother you, the goodies which you’ll enjoy are these: a new set of sounds for wireless charging, a USB debug white-list and the possibility to long-press the WiFi and Bluetooth icons in Quick Settings to be able to quickly toggle the on/off state. Low battery bug fixes, a new set of download notifications, a new Gallery app and no Bluetooth audio streaming bugs are other novelties you can expect from your tablet after it’s updated.
The KIES logo which comes with the new firmware is activated. As such, you can upgrade the Galaxy Tab 3 10.1 GT-P5210 with the KIES software. Your gadget must be running a stock ROM if you plan on using this method.
Prerequisites
Requirements are now needed:
- here you’ll find USB drivers to download on your laptop (they work with your tablet);
- your laptop should only operate Windows for this guide;
- USB Debugging must be turned on;
- charge the battery of your Galaxy Tab 3 10.1 GT-P5210;
- a full NANDroid backup must be performed after a standard one has been created;
- the laptop has some security programs which must be disabled for the duration of the guide;
- the same will have to happen to your tablet’s security solutions.
Step by step instructions
- The first step towards a successful upgrade: on your notebook, be sure you have the Jelly Bean 4.2.2 ZHUANA1 (the Hong Kong version can be downloaded ) and Odin (available on this page). If you’re done downloading them, they have to be extracted with one of these: 7Zip or WinZip.
- If the contents of the two packages are part of your laptop: boot the tablet in Download Mode. Therefore, do as follows: press and simultaneously hold Volume Down and Power, move on by waiting for a screen of warning to come out and press Volume Up when it does.
- Immediately afterwards do the following: go to the Odin and make sure it’s launched as an Admin on the laptop. After it is, you should use the tablet’s USB cable. Why? Because the tablet must be connected to the notebook with its help.
- Once the plugging has been created, the display should have an “Added!!” message combined with an ID:COM box colored yellow or blue. But the plugging may not happen. If that’s the case, you should do this: install the USB drivers again on your laptop or make use of another USB port.
- If, however, the connection goes smoothly, you can now move on to the next step. Which looks like this: tap BL, opt for a file with BL in the name, tap AP, choose a file with AP in the name, tap CP, choose a file with CP in its name, tap CSC, select a file which has CSC in the name, click on PIT and choose a file with an extension that has .pit in it.
- After all of this is performed, you should check some important boxes. You’ll find them named F. Reset Time, Auto Reboot and Re-partition.
- After their activation, you need to go to “Start” and tap it. The new Jelly Bean 4.2.2 stock firmware is about to begin its flashing on your tablet. As soon as the process is all done, wait for this to happen: the Galaxy Tab 3 10.1 GT-P5210 shall reboot and its touchscreen will contain a message that should read “Pass“.
- [sc name=”banner-jos”]If the restarting happens as expected and that message pops up, you can move on to our last step: unplug the tablet from your laptop. The update is now over!
A good way to launch the new firmware is this: tap Settings and after that click on About Tablet. If done with this part, then be prepared to get the most out of the ZHUANA1.
If, at the end of the testing, the firmware doesn’t rise up to expectations, go back to the NANDroid backup file. Its use will help restore the previous ROM on the tablet.
We’re eagerly awaiting your comments and questions!


