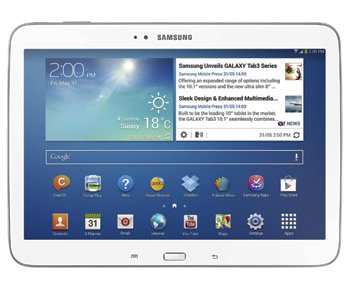
How to Install Android 4.2.2 UBUANB1 on Galaxy Tab 3 10.1 GT-P5200
There’s a certain way towards a better performing Galaxy Tab 3 10.1 3G+WiFi GT-P5200. That way is through an update to a special version of Android. If we managed to make you curious, the full procedure is described in our upcoming guide.
The Android variant we plan on installing on your tablet is this: Android 4.2.2 Jelly Bean. The firmware that comes with it is UBUANB1. Argentina is among the first countries to experience this if your device is available on Movistar. The new firmware came out this month.
The novelties
If you plan on updating a rooted Samsung GT-P5200 with it, certain things will happen afterwards. Both positive and negative. Starting with the positive ones: both important data and internal / external SD cards will stay on your tablet. Negative points: the gadget’s root access will be revoked and the system partition will get revoked.
The Android 4.2.2 JB has plenty of stuff to keep you entertained. This latest version packs, for starters, a USB debug white-list. Other novelties to expect: a new set of download notifications and better Bluetooth audio streaming. Among the goodies you will also come across a new Gallery app. This OS will bring these, too: low battery bug fixes along with a new set of sounds for wireless charging. Coming up next is this: the option of long-pressing the WiFi Bluetooth icons in Quick Settings in order to be able to toggle the on/off state.
The update firmware has no activated KIES logo. You will be left with two options for the upgrade. One is OTA and the other one is today’s tutorial. To update your tablet with the former, this device has to have stock ROM.
The update will only be successfully if the right tablet model is used. Make sure you don’t use a different gadget because it will be bricked in an instant.
Prerequisites
The pre-requisites we need you to look into now are these:
- turn on USB Debugging on the tablet;
- the security programs running on the tablet should not be functioning anymore during the upgrade, so disable all of them;
- the security programs which come with your laptop have to be deactivated for now;
- your notebook’s operating system needs to be Windows;
- your notebook’s going to need USB drivers for the tablet, so find them online and download them there;
- create a bunch of backups;
- create a full NANDroid backup, via the tips from this page;
- fully charge your Galaxy Tab 3 10.1 GT-P5200.
Step by step instructions
When the tablet has gone through all of these requirements, you will be free to start with the upgrade. The action that puts the guide into motion: download a bunch of packages on the notebook.
- The first of them is called Odin v3.09 and is available here. The other package is the . Now proceed to this step: unzip the packages. After you are finished with that, Odin v3.09.exe will greet you as one of the files inside the Odin v3.09.
- Open this file on the notebook and restart your tablet in this mode: Download Mode. The actions which will make this happen are as follows: press and hold Home, Power and Volume Down. Once you spot a boot message, press Volume Up.
- When the tablet restarts into the Download Mode as recommended, you will need to go and take the tablet’s USB cord. That’s because it needs to plug the Galaxy Tab 3 10.1 GT-P5200 to your laptop.
- If the Odin signals the creation of the connection via a blue sign, you will be able to continue with the rest of the guide. Which sounds like this: add the firmware file to AP / PDA and make sure that Auto Reboot and F. Reset Time are checked. Re-partition will have to become unchecked.
- The best thing to do now is to tap “Start“. This allows the installation of the UBUANB1 official firmware to begin. When the tablet has “Pass” pop up on its touchscreen and then it restarts, the guide will only require 1 more step.
- [sc name=”banner-jos”]This one will need you to do the following: unplug the tablet from your laptop. Once the two are not connected to each other anymore, go to the device, tap Settings on it, then tap About Tablet. The Android 4.2.2 JB UBUANB1 stock firmware will then appear and you will get to make good use of its features, apps and so on.
Should you not like the newest addition, you should find and use the NANDroid backup file. The risk of doing that: the update’s going to be revoked.
Use the comment box below if you wish to ask us something.


