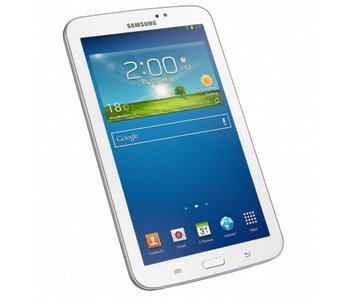
How to Flash Android 4.2.2 UEUANC1 on Galaxy Tab 3 7.0 Lite SM-T110
Galaxy Tab 3 7.0 Lite SM-T110 is today’s tablet destined for Android 4.2.2 Jelly Bean. If you can’t wait to enjoy this OS, find out how to update your gadget to it below!
This month saw the launch of UEUANC1. This is the official firmware that’ll help with the upgrade. So, if you’re based in USA and South Cellular is the carrier you use for your tablet, join us! We have all the steps that will update your Galaxy Tab 3 7.0 T110 to the Android 4.2.2 JB.
The novelties
The operating system mentioned above has many surprises for you and your tablet. The gadget you use must be the model we discussed; in case it’s not, you will only brick your device. Let’s see what goodies your gadget shall have: superior Bluetooth audio streaming, low battery bug fixes and a new set of sounds for wireless charging.
Then there is also a new Gallery app as well as a USB debug white-list. A new set of download notifications is also on-board, as is the option of long-pressing the WiFi Bluetooth icons in Quick Settings in order to be able to toggle the on/off state. Not to be forgotten: customization options.
If your Galaxy Tab 3 7.0 Lite SM-T110 is a rooted one, the gadget won’t contain root access after the update. Its internal and external SD cards together with important data won’t be damaged. But the device’s system partition will become deleted.
Prerequisites
After you make sure you use the right tablet version, check the following requirements out:
- your tablet’s valuable data should be saved via backups (throw in a full NANDroid backup for good measure);
- download USB drivers for the Galaxy Tab 3 7.0 Lite SM-T110 on your notebook;
- go to the tablet and turn off its security programs;
- the notebook should have its security programs disabled, as well;
- enable USB Debugging on your gadget;
- charge the tablet’s battery until it’s full;
- use a notebook that ships with Windows.
Step by step instructions
What needs to be done now is described in the steps below.
- The one that begins the update tells you to do the following: download, on your notebook, two packages. The Android 4.2.2 JB UEUANC1 for .
- The other package is called Odin v3.09 and you will discover it here. WinRar or 7Zip will help you extract each of these packages on your laptop. When done with this job, search for this file: Odin v3.09.exe.
- After locating it, open it on the laptop and do this next: boot the tablet in Download Mode by pressing and simultaneously holding Home, Power and Volume Down, do it until a boot screen comes up and, when it does, press only Volume Up. Next: connect the tablet to the laptop.
- A connection should be established among your two devices like this: use the tablet’s USB cord and wait till the Odin shows you a sign in blue. This way you will find out if the connection truly happened.
- After it does, it’s best to move on by adding the firmware file to AP / PDA. Here is the step to perform next: activate those boxes with Auto Reboot and F. Reset Time next to them, then deactivate Re-partition should it already be checked.
- To make the flashing of the new firmware start, here’s what should be done: look for “Start” and tap it. This installation process will require some 15 minutes (or less) to finish.
- When the fifteen minutes are up, you should wait for a message to be displayed on the tablet’s touchscreen. This message should look like this: “Pass“. Also, it should appear in a green-colored background.
- As soon as “Pass” in green pops up on the display of your Galaxy Tab 3 7.0 Lite SM-T110, the tablet will automatically restart. This will tell you that you can perform the last step.
- Which is as follows: unplug the tablet from the notebook. To unplug them correctly, make sure you remove the USB cable.
- [sc name=”banner-jos”]Then go to your gadget, tap Settings and after that be sure to have About Tablet tapped. This will help you enjoy the new firmware on the spot.
If you don’t like the UEUANC1 at all, you should have the former ROM restored. The NANDroid backup file is the means of achieving that. The update procedure will be revoked after the old ROM is back on your tablet.
In order for us to answer your questions, remember to post them in the comment field below!


