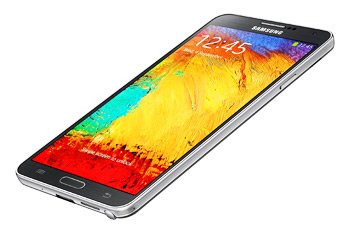
Android 4.4.2 KitKat VLUCNB7 on Galaxy Note 3 SM-N900W8
You should keep your sights on this guide, because it shows you how to get Android 4.4.2 on Galaxy Note 3 SM-N900W8.
The secret to a well-performed update lies in the firmware you use. In our case, VLUCNB7 is the one to do the trick. But only if the smartphone you’re installing it on is the Samsung N900W8. If the model you use isn’t this one, your version is going to be damaged.
The VLUCNB7 firmware is intended for Canada. The carriers which support it are Bell Mobile, SaskTel, EastLink, Fido Mobile, Globalive Wind Mobile, Koodo Mobile, Mobilicity, Rogers, Telus, Video Tron and Virgin Mobile.
The novelties
Now that you know what device to use, you should be aware of the following: the new firmware has an activated KIES logo. If you’re a newbie, this means that Samsung’s own KIES can be used as an update tool. To do that, however, your phone must be sporting stock ROM. Should it not, you can instead make use of our tutorial.
The Android 4.4.2 KitKat OS is the perfect tool to use if you want to fully enjoy your handset. This version will bring several great customization features and a wealth of new features. The new OS allows you to make good use of many new apps and all sorts of ways to enjoy better battery life. The smartphone will not face security threats.
If your Galaxy Note 3 comes with root access, the upgrade shall get rid of that. Another damage that’ll be done to your handset: its system partition will be erased. The important data will remain intact; as will the internal and external SD cards.
Prerequisites
The update should be preceded by these pre-requisites:
- you need to have a notebook whose OS is Windows;
- the smartphone must have its security software turned off;
- the laptop must also have its security solutions disabled;
- to save the important data on your Galaxy Note 3 SM-N900W8, you should consider backing it up;
- provide a full NANDroid backup afterwards, using these instructions;
- fully charge the handset;
- there are some USB drivers that must be downloaded on your laptop from here (they’re fully compatible with the handset);
- turn on USB Debugging on it.
Step by step instructions
Time to see what steps you must perform to upgrade your Samsung N900W8.
- Here is the first of many: get Odin v3.09 and the new you use (you must search for “VLUCNB7″ on the ” Select your firmware” area). Now that the latter contains the two packages, unzip them afterwards (7Zip or WinRar can be used here). Once the unzipping is complete, wait for a file known as Odin3 v3.09.exe to pop up.
- This file will then have to be launched on the laptop. Continue by performing this task: enter the phone in Download Mode. You will have to boot it as detailed here: simultaneously press and hold the buttons known as Home, Power and Volume Down, release them after a boot screen is displayed, then press Volume Up.
- The smartphone can now be connected to your laptop. This procedure needs to be performed with the phone’s USB cable.
- Once you’re done using it, the Odin will start looking for the handset. After it sees it, a sign in blue will be delivered on the screen. Your next task will be this: go to the firmware file, be sure it’s added to AP / PDA and then check F. Reset Time and Auto Reboot.
- If you look around at the other boxes, you will see that the one labelled Re-partition is also checked. You need to uncheck it. After this box is no longer ticked, we recommend doing this: click on “Start“.
- This will begin the new firmware’s flashing phase, which will need about 14 minutes to end. If those minutes are over, you will be shown a green background containing a message that says “Pass“.
- Now wait until the Galaxy Note 3 SM-N900W8 reboots shortly afterwards. After the handset has rebooted, you should go and disconnect the smartphone from the notebook.
- [sc name=”banner-jos”]This will make it easier to take in the goodies that the new official ROM has to offer. Speaking of the new firmware: open it by choosing Settings first, then selecting About Phone and tapping it. Once the VLUCNB7 is revealed, do what you want with it.
Should it disappoint, there’s always the handy NANDroid backup file to use. This is a file which makes it very easy to get back to the phone’s older ROM. If you choose to restore it, prepare to have the upgrade revoked.
For comments and questions, kindly use the box under this tutorial!


