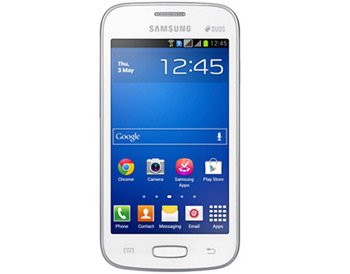
How to Flash Android 4.1.2 XXUAND2 on Galaxy Star Pro GT-S7262
Galaxy Star Pro GT-S7262 will, very soon, enjoy everything that makes Android 4.1.2 a must-have. New features, tweaks to personalize the device and other goodies will welcome you when you’re done with our guide!
The Samsung GT-S7262 has new stuff to look forward to. You’ll have all of that only if you use this smartphone, not another one. A different handset will only suffer.
Here are the goodies belonging to this OS: group cast, a brand new keyboard and all share. To move on, there are also pop up play, triple buffering and a fixed frame of 60 fps. Automatic adjustment for the size of widgets as well as extended Vsync timing are also welcome. Also, your phone will get Google Now, mini apps and free style widget. Bringing up the rear are these: sync and connect email updates along with touch anticipation.
Jelly Bean 4.1.2 XXUAND2 is the firmware that helps deliver this upgrade. Released this month for April, the firmware comes with a deactivated KIES logo. Which brings us to this point: Samsung’s KIES can’t be used for the procedure. Instead, try OTA if you don’t want to update your handset with our tutorial. For the OTA option, you should make sure the following is on your phone: stock ROM.
Prerequisites
The next instructions act are requirements:
- your laptop should have Windows among its important specifications;
- the battery of your handset has to be charged if its power levels are low;
- enable, on the Galaxy Star Pro S7262, USB Debugging;
- the handset’s security programs must be turned off;
- the ones on your notebook need to also be activated;
- on this page are those USB drivers fit for your phone and they must be download on your notebook;
- after you’re done performing a standard backup, perform a full NANDroid backup.
Step by step instructions
You have to perform the following to begin the guide: download certain packages on your laptop.
- One of them is the . The other’s name is Odin v3.09. Their content has to become part of the laptop next. For that, make sure you unzip them with 7Zip, WinZip or WinRar.
- After this, continue with these tasks: once some files come out of the extraction, select the one labelled Odin v3.09.exe. Launch it now on your notebook.
- The smartphone should be booted into Download Mode next. Do it like this: press and hold Home, Power and Volume Down at the same time. This will trigger the apparition of a boot message, which will tell you that the next thing to do is to press Volume Up.
- You now have to move on to the establishing of a connection between these devices: the phone and the laptop. The USB cable that gets shipped with the handset will create this connection. Odin is going to go and find the Galaxy Star Pro S7262 for you.
- When it sees it, it will display a blue sign. Upon seeing it, go to the next task, which is the following: add the firmware file to the AP / PDA. Now be sure to activate certain boxes named F. Reset Time and Auto Reboot. Among the many boxes that’ll come on-screen, Re-partition is checked by default; it needs to be unchecked.
- After you do that, click on “Start“. By enabling this option, you will soon notice the beginning of the new firmware’s installation. Your handset will announce the end of the flashing via some signs. But first, allow the beginning and end of the installation to happen.
- Once you have already waited for about 10-13 minutes, the Galaxy Star Pro GT-S7262 will have something to show you in order to let you know that the flashing’s done.
- First, it will display “Pass” in all-green. Second, it will automatically restart. As soon as the latter is finished, the smartphone and your laptop will need to be disconnected from one another.
- [sc name=”banner-jos”]Until that happens, you need to help the process by taking the USB cable out. Tap Settings now, then tap About Phone.
By doing as instructed for the previous step, you will get quick access to the Android 4.1.2 XXUAND2. If the update and the new operating system version are not as awesome as you expected them to be, there’s the NANDroid backup file for use. The old ROM will be restored on your phone with its help.
We have a comment field under this post. Leave your questions there!


