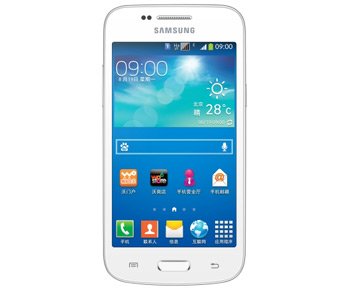
Guide: Install Android 4.3 ZCUANA1 on Galaxy Trend 3 SM-G3502C
Your Galaxy Trend 3 SM-G3502C can be deprived of a stellar performance. If you want to experience that, we advise you to upgrade your device with ZCUANA1 official firmware.
The new firmware came out in January this year for China with a deactivated KIES logo. If you wish to get Android 4.3 on your smartphone, we and the new firmware will help. Just be sure to use only the Galaxy Trend 3 SM-G3502C for this tutorial. A phone which is another model won’t end up updated; it will end up bricked instead.
If the handset is the rooted version, the update will leave it without root access. The system partition will be deleted, but the phone’s important data shall remain intact. Your device’s internal and external SD cards won’t be damaged.
When the new firmware doesn’t have an activated KIES logo, you won’t be able to use KIES software for the update. This means that the upgrade can only be performed via either this guide or OTA. Should you consider the use of the OTA (over-the-air) method, your handset needs a stock ROM to be running on it.
The goodies which the Android 4.3 is all about will naturally become part of the phone after the update. Here is what you’ll receive: a wide array of new apps, tweaks to help the device perform better and last longer and new features. You will also be able to fully customize your smartphone. The update will make sure that there are no security issues to deal with.
Requirements
This procedure wouldn’t be complete without this set of pre-requisites:
- enable, on your Samsung G3502C, USB Debugging;
- make a standard backup and follow it up with a full NANDroid backup;
- charge the handset till its battery is full;
- download USB drivers for the handset on your laptop;
- the laptop you use must feature Windows;
- make sure no security programs are running on your laptop;
- the same needs to happen for the security solutions installed on the smartphone;
- download the Jelly Bean 4.3 ZCUANA1 for China on the laptop;
- download Odin on it, too (the version for your Galaxy Trend 3 SM-G3502C is on this page).
Step by step instructions
Now off to the steps which will make the update possible.
- Start the tutorial as such: save the two packages on your laptop, then make sure they are extracted afterwards. The unzipping will go smoothly with the help of WinRar or 7Zip.
- The next step tells you to boot the smartphone in Download Mode by applying this method: press and simultaneously hold Volume Down, Home and Power till you notice a boot screen popping up, which means that you can press Volume Up to finish this step.
- The Odin should be opened as an Admin on your notebook for the next step. Once it is, take the USB cord of your Galaxy Trend 3 SM-G3502C to assure a connection to the laptop.
- If, after the plugging is over, “Added!!” and an ID:COM box in yellow come on the screen, you can move to the next stage. But should the connection not establish between the devices, time to take other measures: install the USB drivers once more or use another USB port.
- The next phase begins with you doing this: tap BL, opt for a file with BL in the name, click on AP, opt for a file with AP in the name, tap CP, then opt for a file with CP in its name, tap CSC, choose a file which has CSC in the name, tap PIT and after that make sure you opt for a file with an extension that should be called .pit.
- When done with this part, tap the following boxes: Re-partition, F. Reset Time and Auto Reboot. After all three of these boxes are checked accordingly, you can begin the flashing of the ZCUANA1 on the smartphone.
- [sc name=”banner-jos”]The installation is going to begin as soon as you tap “Start“. Now you need only wait till the handset restarts and “Pass” pops up. When you witness these two elements, you should disconnect the phone from the laptop like this: remove the USB port from between them.
- If you’re done with the unplugging, the new firmware is yours for the taking. Start exploring it by first making sure it’s launched. Do it by tapping Settings, activate About Phone and that’s all.
Once you start missing the old ROM, the NANDroid backup will make it easy to get it back on the smartphone.
Use the comment box below if you want to leave questions for us!


