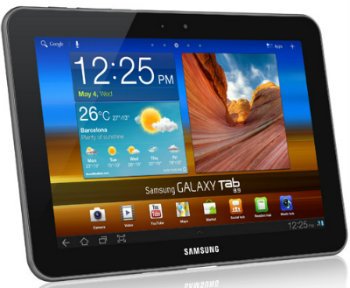
Upgrade Galaxy Tab 8.9 GT-P7300 to Android 4.0.4 ICS XXLQF Official Firmware
The time is ripe for a guide on how to update your Galaxy Tab 8.9 P7300 to Android 4.0.4 Ice Cream Sandwich, particularly since we have XXLQF to help us with our task.
Requirements
Time to also add here some pre-requisites: if your laptop doesn’t run Windows you should use CrossOver Utility, be sure to turn on USB debugging on the tablet, create backups using our dedicated guide (the data contained by the gadget’s internal memory needs to be backed up to an external hard drive using a compatible memory card for the transfer), you have to use the Tab 8.9 GT-P7300 that is bootloader (and carrier) unlocked, charge the battery and flash USB drivers for it on your personal computer.
Important instructions
- Our tutorial is now ready to start. Download these two zip files on your notebook: Odin tool and the . After you unzip these two, find where Odin3 v3.07.exe and .tar.md5 are located.
- Once you see them on your laptop, switch the Galaxy Tab 8.9 P7300 off. Make it boot into Download Mode like this: press and hold Volume Up and Power simultaneously; it’s recommended to stop that after the tablet welcomes you with the logo of Android.

- You will need to concentrate on performing the following tasks now: run the Odin 3.07.exe as Admin (by using the right click method on odin .exe and on “Run as administrator” from the tablet’s context menu) and then plug the device to your laptop; should you notice that the connection isn’t happening properly, you should do one of the following: flash the USB Drivers for a second time or just use a USB port that differs from the one you’ve been using so far.
- Now click on PDA and opt for a file with CODE in its name; follow this up by clicking on Phone and afterwards choose a file which sports MODEM in its name. When you’re done, click on CSC and then select a file whose name contains these letters: CSC. Finish up by clicking on PIT; then opt for a file that will show up as .pit.
- The next to-do actions are as follows: activate F. Reset Time and Auto Reboot. The box titled Repartition will also need to be chosen; but do it only if the .pit file was the one you selected above.
- The XXLQF will be flashed on your tablet after you click on Start.
- [sc name=”banner-jos”]Wait a bit and the Tab 8.9 GT-P7300 is soon going to reboot. Seeing a message that says PASS will prompt you to unplug the gadget from your notebook. Pay a short visit to your device’s “About tablet” section. The firmware we used to update it to the Android 4.0.4 Ice Cream Sandwich will be in that spot for you to check out.
If you ever get to see your tablet stuck in Samsung’s logo, remind yourself that you can get over this problem like this: go to the Recovery Mode, perform Factory reset/Wipe data and then Wipe Cache Partition.
After that you need to opt for the following: restart your P7300. Should your gadget also experience another problem, such as being stuck in boot animation, the same solution as before applies.


