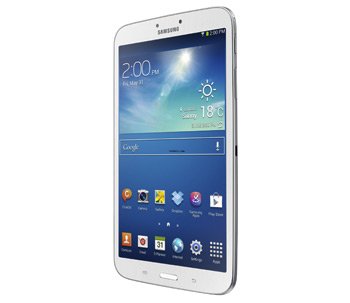
Update Galaxy Tab 3 8.0 T311 with XWUAMH1 Jelly Bean 4.2.2 Official Firmware
Galaxy Tab 3 8.0 T311 is on the verge of a revelation: your tablet is going to have stock Android 4.2.2 Jelly Bean if you upgrade it to XWUAMH1 firmware.
Watch as your gadget displays an even better performance thanks to this type of firmware. Which, by the way, will take care of previous bugs, improve battery life, bring loads of stability to the Android performance and so on. With the help of the new stock firmware, your device will revel in brand new options, features, custom ROMs that you can download on the tablet once it’s updated and many more opportunities.
What’s more, the firmware that will find a place on your gadget is not going to go away. In case you’ve rooted your tablet, its warranty shall come back if you follow our guide. But even if you don’t have the rooted version of the Galaxy Tab 3 SM-T311, you will still be able to get the upgrade.
Requirements
First thing you should do before the update tutorial can begin is to follow these requirements:
- make a backup (a regular one and follow it up with a NANDroid one);
- charge the battery of your tablet;
- turn off software or programs that protect your tablet and your notebook from attacks;
- on your tablet, be sure to turn USB Debugging on;
- flash USB drivers appropriate for your gadget on your laptop.

Instructions
- Moving on, we will show you the steps that your tablet must go through if you want it updated as soon as possible. Download, on your notebook or computer, these files: Odin tool from here and the (file name: INU-T311XWUAMH1-20130913100405.zip). Then don’t move on until both files’ content is extracted on the notebook or PC you’re using.
- Then be sure to launch the Odin on the laptop and switch the Galaxy Tab 3 8.0 T311 off since you will need to make it reach Download Mode by pressing + holding Power + Volume Down + Home at the same time. After the tablet boots into that mode, you should plug it to your notebook.
- The connection is going to go well if the Odin recognizes your tablet. And it will recognize it by displaying “Added!!” and a yellow ID:COM box.
- When none of the signs before show up, you have to try again, but this time install the USB drivers a second time or take the USB cable and use another USB port this time for it. As soon as one of these solution works, you can go to Odin, tap PDA and then opt for the new firmware.
- Leave the boxes dubbed F. Reset Time and Repartition unchecked, then tap START. The update file will then get flashed on the tablet. The end of this installation phase will be over when you see a PASS message along with a green-colored ID:COM box.
- [sc name=”banner-jos”]Unplug the Galaxy Tab 3 8.0 T311 from your notebook next. Then restart the former. The tablet should now have the Android 4.2.2 Jelly Bean XWUAMH1 firmware among its other firmware. See if that’s the case by opening “About Phone” from “Settings“.
IMPORTANT NOTICE: Should the Odin freeze, you should take the USB cord out first, then reboot the device by force and flash the USB drivers again. Then redo the guide from its very first step.
If, however, the tablet remain frozen in boot loops, you need to boot it into Recovery Mode again and then do as follows: choose Factory Reset/Wipe Data and opt for Wipe Cache Partition. Restart the tablet afterwards.


