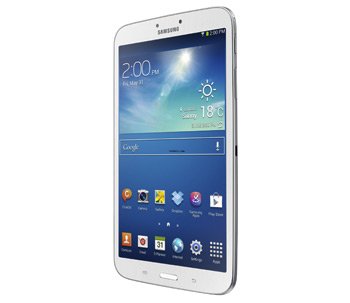
How to Update Galaxy Tab 3 8.0 SM-T311 to Android 4.2.2 ZCUANA1
A tablet for which there are many users in China is none other than Galaxy Tab 3 8.0 SM-T311. In January, new firmware came out so that this gadget’s owners could update it to Android 4.2.2. Find out more below!
This new official firmware is known as ZCUANA1 and it works only with the Galaxy Tab 3 8.0 T311. In case you have another model, we suggest using a different guide. Ours is going to brick your device.
There are various goodies you can enjoy once your tablet is upgraded: a new Gallery app with superior speed when loading, a new set of sounds for wireless charging and low battery bug fixes, USB debug white-list, no Bluetooth audio streaming bugs, the possibility to long-press the WiFi and Bluetooth icons in Quick Settings so that you can easily toggle the on/off state and a whole new set of download notifications.
Using Samsung’s KIES to apply the update is possible; but you need to own a Galaxy Tab 3 8.0 SM-T311 which operates a stock ROM. In case you stick to our tutorial, though, here’s what you should know: if the tablet is rooted, the ZCUANA1 shall be responsible for the following cons: the device will have its root access revoked and he system partition is going to be erased. Don’t worry about the important data: it is going to be preserved. The internal and external SD cards will also come out of this unaffected.
Requirements
Once the disadvantages have been laid out and you aren’t appalled, proceed to the following set of pre-requisites:
- turn USB Debugging on;
- download the Jelly Bean 4.2.2 ZCUANA1 () and Odin from this page on the laptop;
- create two sets of backups (one should be a standard one and the other should be a full NANDroid backup);
- which must have Windows among its specifications;
- USB drivers appropriate for your gadget must be flashed on your notebook;
- if the tablet’s battery needs it, fully charge it;
- on the tablet and notebook, be sure there are no security programs turned on (after you’re done with the tutorial, you can enable them again).

Step by step instructions
- Make way for the first step: after the packages from the requirements are downloaded and saved on the notebook, look for WinZip or WinRar to unzip them.
- Then enter the tablet in Download Mode by doing this: press and hold Volume Down and Power simultaneously, see if a screen of warning comes up and, after you spot it, press Volume Up to arrive in the mode we mentioned.
- The Odin is now required to function as an Admin on the laptop, so launch it and, after that, continue with the following step: take the USB cord of your Galaxy Tab 3 8.0 SM-T311 and use it to plug the tablet to the notebook.
- A connection should be established; to make sure it has, the screen will come up with a yellow ID:COM box and an “Added!!” message. If neither of them is displayed, you should adopt other techniques, so either use another USB port or install the USB drivers once more.
- Follow the previous actions by tapping BL, selecting a file with BL in the name, clicking on AP, opting for a file with AP in the name, tapping CP, choosing a file with CP in its name, tapping CSC, opting for a file which has CSC in the name, tapping PIT and selecting a file with an extension that has .pit in it.
- You are about to see some boxes on the display; choose the following three: Re-partition, F. Reset Time and Auto Reboot. After you activate them, you will see a “Start” button which has to be clicked in order to commence the flashing of the new Jelly Bean 4.2.2 ZCUANA1 official firmware. Wait for the procedure to finish, then for the tablet to restart.
- [sc name=”banner-jos”]A message in green should soon appear; so have patience till “Pass” is displayed, then take the USB cable out to make sure the devices are no longer connected to each other.
- When they’re not, you can go to the Settings on your Galaxy Tab 3 8.0 SM-T311, tap Settings and after that tap About Tablet. The firmware will then be displayed for you to access and experiment with.
If something doesn’t go well with it and you miss the previous ROM, you will find help in the NANDroid backup file. Using it, the old ROM shall be restored; however, the update procedure will be revoked.
Are there problems you wish to report or questions you want answered? Use the comment field below!


