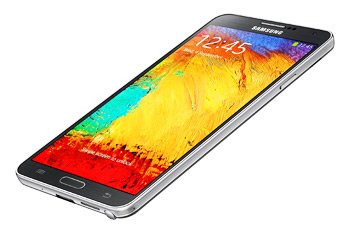
Update Galaxy Note 3 SM-N900W8 to KitKat 4.4.2 UBUCNC1
This guide wants to deliver Android 4.4.2 on Galaxy Note 3 SM-N900W8. Your smartphone should be able to enjoy everything that belongs to this operating system. That’s because this OS version has some very appealing goodies. Find out all about them by using this tutorial!
The only smartphone that must be used for our guide is, as mentioned, the Galaxy Note 3 SM-N900W8. Today’s update firmware will brick your phone if it’s not this model.
UBUCNC1 is the firmware which installs this KitKat version on your phone. It came out for both Mexico (Telcel) and Trinidad and Tobago earlier this month.
The novelties
For you to have full access to the Android 4.4.2 KitKat, you should be aware of this: KIES can only be used if you’re located in Mexico. Even then, your phone must have stock ROM. If you’re living in Trinidad and Tobago, OTA is your best option; again, this method has to be used on a handset running stock ROM.
The novelties you’ll experience thanks to the upgrade are plenty. You can play with various tweaks that help with customization, new apps and much more. As always, you’ll experience a battery which lasts much more.
If the smartphone contains root access, the update will revoke it from your device. Then you will no longer have access to the phone’s system partition. But you will have access to both important data and the handset’s internal / external SD cards.
Prerequisites
Your Samsung SM-N900W8 is now required to pass through the following steps:
- Windows needs to be the operating system your laptop is equipped with;
- the battery on your phone must be charged fully;
- go to the laptop and disable the programs used to protect it against security issues;
- get USB drivers for the handset on your laptop from this site;
- make some backups for the data on your smartphone;
- generate a full NANDroid backup;
- the phone’s security software will have to be disabled, as well;
- turn USB Debugging on.
Step by step instructions
- Find the and . Download it on the laptop after you do. You should then get Odin v3.09 downloaded from here on the laptop and unzip it. The first package you just downloaded must also be extracted.
- This is something WinZip or WinRar can help with, so use one of them. Launch Odin v3.09.exe on the notebook as soon as the unzipping ends.
- You are now supposed to boot the phone in Download Mode. Your device’s restart in this mode is possible with these actions: press and hold Home, Power and Volume Down for a couple of seconds till a boot message is displayed; press Volume Up now.
- You are now asked to connect the smartphone to the laptop. This task is best done with the use of your handset’s USB cable. As soon as the screen comes up with a sign colored in blue, you will be able to move on.
- Once your devices are connected as indicated, you have to make sure the firmware file is moved to AP / PDA. The display will soon be covered in specific boxes. Out of them, only these two should be ticked: Auto Reboot and then F. Reset Time. You must uncheck Re-partition when you see it’s already checked.
- The UBUCNC1 official firmware is now needed for your phone. To install it there, tap “Start“ and the flashing will begin. The screen of your handset will, after around 13 minutes, greet you with a “Pass” message in a green background.
- The device will, after that, go into a rebooting sequence, which will end in a few minutes. Your job now is to perform this: disconnect the phone from your laptop. Which is why the USB cable must now be removed from the two before anything else happens.
- [sc name=”banner-jos”]Your Galaxy Note 3 SM-N900W8 is now completely equipped with the KitKat 4.4.2 UBUCNC1 firmware. Your smartphone can finally enjoy the kind of goodies that only this KitKat version is able to offer.
If they’re not as exciting as they first seemed to be, your handset’s previous ROM can easily be restored on it. The key to that is the previously created NANDroid backup. The file that resulted from it will help get the old ROM back where it used to be. Once done with this, the update will be revoked from the handset.
A comment box is posted below this guide so you can leave your questions there!


