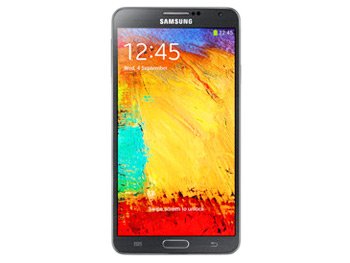
How to Update Galaxy Note 3 SM-N9000Q to KitKat 4.4.2 XXUENG4
Let your Galaxy Note 3 SM-N9000Q be updated and everything will be so much the better for it. As soon as you’ll be done with the procedure, the handset will outshine its previous performance. New features will be present, too. Other goodies will appear, as well. For all of this and more, here’s a tutorial!
The upgrade of your phone will be possible only if it contains an official firmware. The one that’s compatible with the device is this: Android 4.4.2 KitKat XXUENG4. It just came out for Turkey (La Fleur). This firmware isn’t useful if you have another model and you want it updated. The new firmware works solely with your handset.
The benefits of this official firmware
The new firmware suitable for your device has a KIES logo. It is fully activated, so the tool can be used if you want another update method. To have the best results, your smartphone should have stock ROM!
The Galaxy Note 3 SM-N9000Q will feature many new things. The upgrade will make sure that it has customization options first of all. Then you will gain battery tweaks to help with battery life. The processor speed will also receive improvement. After the smartphone starts moving faster and lasting longer, you will also enjoy new features.
An update also translates into new apps. But the upgrade doesn’t translate into security problems. Apart from not having those, your device will also lack bloatware.
Every update ever performed brought disadvantages to an owner’s gadget. Particularly if said device had root access. So, if your Samsung SM-N9000Q also has that, the update will revoke it. Another consequence of performing this procedure on a rooted gadget: its system partition will be removed. The handset will not come out of the upgrade without its internal or external SD card. Likewise, the phone is able to keep its important content.
Prerequisites
To go through an update, one must get along with a well-prepared device. Which means that it’s requirements time! This is what you should do now:
- deactivate your laptop’s security programs;
- then deactivate the programs which protect the Galaxy Note 3 SM-N9000Q from security problems;
- you need to go on by performing standard backups for the phone;
- generate, afterwards, a full NANDroid backup;
- Windows must be the only OS version on your laptop;
- install USB drivers for the handset on the laptop you’re using by accessing this page;
- the battery on your handset needs to be fully charged;
- the smartphone must then feature a turned on USB Debugging.
Step by step instructions
Don’t shut down your laptop. This product needs to be running so that you can download some packages on it.
- First of all, download this one: Odin v3.09. Then download the for Turkey (file name: N9000QXXUENG4_N9000QTURENG3_TUR.zip). These 2 important packages must then be extracted. Usually, this is doable via one of these methods: WinRar or WinZip.
- Once you are done with the unzipping phase, launch this on your laptop: Odin v3.09.exe on your laptop. A certain mode has to be reached by your smartphone. Its name is Download Mode.
- In order to properly enter this mode, you need to do this: press and simultaneously hold Home, Power and Volume Down until the moment your device has a boot message on its screen; when it has, Volume Up must be pressed.
- Provide, with the phone’s USB cord, a plugging between this device and laptop. The duration of this process won’t be long. You will know when it’s done as soon as Odin has a sign in blue to deliver. After the products have entered the plugging, you can take the firmware file to AP / PDA.
- At the end of this step, activate several boxes. One of them is Auto Reboot; the other one of F. Reset Time. Another box you need to pay attention to is Re-partition.
- [sc name=”banner-jos”]This particular box has to be unchecked, though. For the following step, make sure you begin the flashing of the new XXUENG4 official firmware. To do that, tap “Start“.
- Several minutes will pass before you see a message. It should be this one in a green background: “Pass”. When done displaying the necessary message, your smartphone will reboot.
- Go and have your two devices unplugged from one another; take the USB cable out to enable this. Settings and About Tablet are the options you need to check next.
To get rid of the update if you don’t like it anymore, use the NANDroid backup file we asked you to create earlier on. Using this file, your Samsung SM-N9000Q will receive its past ROM back.
If there are questions about the upgrade, post them in the comment field below.


