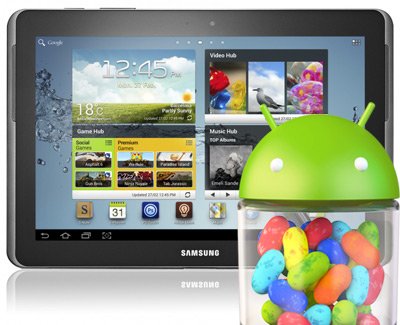
Update Galaxy Note 10.1 GT-N8000 to Android 4.1.2 XXCML2 Firmware
We have something new for your Galaxy Note 10.1 GT-N8000: a tutorial which will update it to Android 4.1.2. This operation is possible only if you use XXCML2, a new type of firmware released this month.
If you’re living in the Nordic countries, Brazil, Spain, Italy, Ukraine, Ukraine (Kyivstar), Spain (Movistar), Open Austria, Kazakhstan and Russia and your tablet of choice is the Galaxy Note 10.1 N8000, the new official firmware is what you need for the update we mentioned.
If you don’t have the gadget we recommended, use a different guide; this one will brick the device if it’s the wrong one. Also, if you use a rooted Galaxy Note 10.1, the new firmware shall erase system partition and revoke root access. But the following won’t share the same fate: the important data as well as the internal/external SD cards.
The novelties
The KIES logo of this firmware is turned on; when it’s activated, you can use the KIES software to upgrade your tablet, too. But only if there’s a stock ROM pre-installed on the device.
The goodies which are available for you once the upgrade is achieved are detailed next: group cast, sync and connect email updates, triple buffering all share, pop up play, extended Vsync timing, automatic adjustment for the size of widgets, Google Now, touch anticipation, mini apps, a fixed frame of 60 fps, free style widget and a better keyboard if you love typing out messages and whatnot.

Requirements
To achieve a successful update to XXCML2, you must follow our steps. For now, though, follow these pre-requisites:
- charge the battery of the Galaxy Note 10.1 GT-N8000 if that’s necessary;
- use only a notebook with Windows on it;
- turn off the security programs that come with both the laptop and the tablet;
- create, apart from a standard backup, a full NANDroid one (the guide is here);
- turn USB Debugging on the tablet;
- go here and look for USB drivers compatible with the tablet;
- flash them on the laptop.
Step-by-step instructions
- We have these instructions for our first step: download the Jelly Bean 4.1.2 XXCML2 stock firmware (you must choose the file compatible with your country: , , , , , , , , and ) and Odin from this page on your laptop, unzip them both with WinRar or Winzip and then boot the device in Download Mode.
- The latter is accessible via these guidelines: simultaneously press and hold Volume Down and Power, wait for the arrival of the icon for Android and after that press Volume Up. After you’re directed to the Download Mode on your tablet, be sure to launch, on the same laptop, the Odin 3.09.exe as Admin.
- The next step you need to perform asks you to use the gadget’s USB cord to make sure a connection is established between the tablet and the notebook.
- Once Odin locates the Galaxy Note 10.1 N8000 at last, you will notice the following: a message that reads “Added!!” and an ID:COM box which should become yellow. If the message and the box don’t come on-screen, you have to either install the USB drivers again or resort to a different USB port.
- When done with the plugging, you will have to tap BL, select a file with BL in the name, click on AP, opt for a file with AP in the name, tap CP, opt for a file with CP in its name, tap CSC, choose a file which has CSC in the name, tap PIT and choose a file with an extension called .pit.
- Up next you will come across some boxes. Only these three must be checked: Re-partition, F. Reset Time and Auto Reboot. You will then need to start the flashing of the new firmware.
- Which should be done like this: tap “Start“. After waiting for a while, the XXCML2 will have landed on the tablet. As soon as it does, the gadget is going to do the following: restart on its own and then display, in green, “Pass“.
- [sc name=”banner-jos”]Now’s the time to take the USB cable out so that the two devices are not connected to each other anymore. When there’s no plugging going on, go to your gadget’s Settings, tap About Tablet and the new firmware will wait for you there.
Enjoy it and, if you don’t really like it, restore the old ROM. Which will happen after you use the NANDroid backup file to revoke the update procedure.
If something doesn’t go as it should during the update, leave a comment in the section below this post. We’ll come and help with any question you may have!


