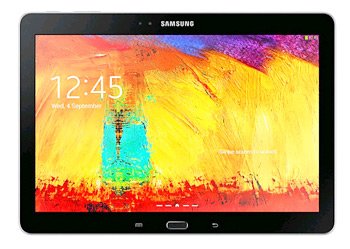
How to Install Android 4.3 ZSUBNC2 on Galaxy Note 10.1 LTE SM-P605
Today we will take your Galaxy Note 10.1 LTE SM-P605 on an adventure. It will end in an update for your tablet, which can only mean one thing: Android 4.3!
To fully enjoy the procedure, make sure you are armed with the Samsung SM-P605. In case there’s another tablet you want upgraded to the new Jelly Bean, kindly use another guide; ours shall brick it.
The new OS will appear on your gadget with the aid of ZSUBNC2. The release date of this new firmware is this month. Hong Kong and Taiwan are the main regions which have so far received this update.
Samsung’s KIES shouldn’t be considered for the update: the firmware isn’t equipped with an activated KIES logo. But there’s always our guide or OTA (to use the latter, your tablet must come with stock ROM; our tutorial is available even if there’s no stock ROM on your gadget).
The novelties of the Android 4.3 are meant to bring plenty of performance boosters for your tablet. Apart from that, customization is also possible. Moreover, the new firmware won’t threaten your gadget with unwanted bugs.
The firmware will erase root access if your tablet has that. Also, the tablet’s system partition will be deleted. There won’t be damage done to the important data or internal / external SD cards.
Prerequisites
All of you who are interested in this update, do this:
- turn on USB Debugging;
- look for USB drivers here and download them on your laptop (they will only work with your tablet);
- you need to ensure the protection of the tablet’s data by making backups (include a full NANDroid backup among those);
- don’t use a laptop whose operating system is not Windows;
- fully charge the battery unit belonging to your tablet;
- you need to deactivate, for our tutorial, the security programs that come with your notebook and your tablet.
Step by step instructions
When the Galaxy Note 10.1 SM-P605 is ready for our guide, all you’ll need to do is start it.
- The action you need to do first: download the Jelly Bean Android 4.3 ZSUBNC2 and on your laptop. Then download Odin v3.09 on the same device as before.
- Extract the packages with 7Zip and launch the one that has Odin v3.09.exe as its name. Once this file is launched on the laptop, enter the tablet in Download Mode.
- This Download Mode has to be launched like this: after you press and hold Home, Power and Volume Down simultaneously, a boot message is going to welcome you; press Volume Up when it does.
- When this step is completed, move on to another task, which is this one: make sure a connection is established between the tablet and your notebook. This needs the tablet’s USB cable for help. If the Odin welcomes you with a sign in blue, you will be able to continue with the tutorial.
- Here’s how: look at the screen and wait until you see some boxes with various names next to them. From among these boxes, Auto Reboot and F. Reset Time need to be checked.
- When you notice that Re-partition is checked, you need to uncheck it. Now add the firmware file to AP / PDA. “Start” is the option that has to be tapped so that the ZSUBNC2 can be installed on the Galaxy Note 10.1 LTE SM-P605.
- “Pass” will come up when around 15 minutes are over and the gadget shall restart. This will show you that the new firmware has been flashed on your tablet. As of this moment, you are left with only one step: disconnect the tablet from the other device it’s been connected to.
- [sc name=”banner-jos”]To easily launch the goodies of the new Android 4.3 JB, you have to take our lead and do this: tap Settings on the Samsung SM-P605, tap About Tablet and enjoy!
If the new OS is unsatisfactory and you want the old ROM back: restore the latter by using the NANDroid backup file we advised you to create. The fact that the previous ROM will return to your tablet after that means that the device will not be updated anymore.
Should you have comments or questions for us, our comment box is always open!


