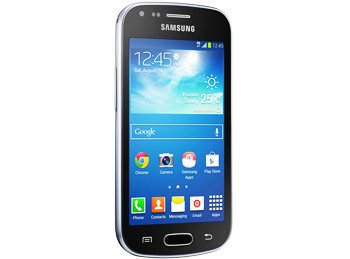
Install Android 4.2.2 XXUBNG1 on Galaxy Trend Plus GT-S7580
Better things are coming for your Galaxy Trend Plus GT-S7580. The smartphone is soon going to receive a most important update. Check it out and learn how to land it on your own device!
Android 4.2.2 XXUBNG1 is what your handset will need for the upgrade. This firmware is 100% official and you can only use it if you have the right phone model. If you aren’t using the Galaxy Trend Plus GT-S7580, you should follow a different tutorial than ours. This guide will only damage your device.
The new firmware came out this month for Spain. Its job is to provide your smartphone with all that it needs to perform better. But this isn’t the only reason you should install the official tool. The Android 4.2.2 Jelly Bean XXUBNG1 delivers many impressive novelties.
The benefits of this stock firmware
You can, if your phone’s featuring stock ROM, use this update method instead: Samsung’s KIES software. The firmware we selected has an activated KIES logo that enables you to use that software. But if there’s no stock ROM on your own handset, you can upgrade the latter using our tutorial.
The novelties delivered via an update are mentioned here. The first batch includes a USB debug white-list and a new Gallery app. Coming up next is a new set of download notifications. The goodies are also made of low battery bug fixes and superior Bluetooth audio streaming. Following those is this option: to long-press the WiFi Bluetooth icons in Quick Settings to be able to toggle the on/off state while using your phone. The presence of a new set of sounds for wireless charging completes the list of new stuff.
When root access is already a part of your phone, the upgrade will eventually revoke it. This pocedure will erase, afterwards, the handset’s system partition. The following will be spared: internal / external SD cards and important data.
Prerequisites
If you aren’t scared of these disadvantages, prepare to perform the following requirements:
- enable USB Debugging on the Samsung GT-S7580;
- make sure no security programs is running on your handset;
- the security software used by the notebook needs to be turned off;
- charge the battery of your handset till it’s full;
- download USB drivers for the handset you use on your laptop;
- Windows must be the only OS variant running on the laptop;
- generate one or a couple of backups to keep the data inside your phone safe during the procedure;
- a full NANDroid backup is the next thing to perform.
Step by step instructions
- Keep your notebook open; you’ll need to download and then unzip a couple of packages on it. They are Odin v3.09 (available here) and the .
- The extraction of both of these packages can be done via 7Zip or WinRar. After the unzipping ends, you’ll need to launch this on your notebook: Odin v3.09.exe.
- Be sure to enter the phone in Download Mode for the next step. The only way of doing this is by following some crucial guidelines. They tell you to do this first: simultaneously press and hold Home, Power and Volume Down. Do that till a boot message emerges; when it does, press only this button: Volume Up.
- Having completed that, establish a connection between the Samsung GT-S7580 and notebook. Do this via the former device’s USB cable, then wait.
- Odin will scan for your handset; you’ll know if he’s successful when you see a blue sign. The plugging has just been created. Add the firmware file to AP / PDA.
- You should move on by turning on Auto Reboot. Then turn on another option; this one is called F. Reset Time. Tap “Start“ as soon as you’ve deactivated this box: Re-partition.
- By tapping the “Start“ option, your phone will go through an installation of the new firmware. This process will be over once you see a message in green. This message should say the following: “Pass”.
- [sc name=”banner-jos”]Now allow your phone some time to start again. The rebooting of your device means that only one more step is left for today’s update. And it indicates the following action: disconnect the devices from each other by removing the USB cord.
- To launch the official firmware, tap these two: Settings and About Phone. You will soon have access to those upgrade possibilities.
In case they fail short of what you were expecting, the old ROM can always be restored. Which is why you had to generate a full NANDroid backup. The file which resulted from that action will revoke the update, thus retrieving the previous ROM.
If you’re lost among all of these steps or you have problems with the procedure, use our comment box.


