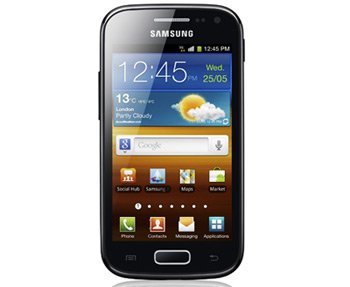
Install Android 4.2.2 Touchwiz Revolutionised custom ROM on Galaxy Ace 2 I8160
Galaxy Ace 2 I8160 is your ticket to new and great experiences if you’re on your first smartphone ever. But, if you already own this model, you should brace yourselves for Android 4.2.2 Jelly Bean Touchwiz Revolutionised Firmware. The tool is based on the interface of the manufacturer’s S4 among many other things.
Those many other things mean CM10.1 platform, S4’s lockscreen, weather widgets, settings, launcher, status bar, tones, contacts and dialer. The right way to obtain an upgraded phone is to immerse in today’s tutorial which contains both requirements and updating steps.
Requirements
Here are the pre-requisites:
- root the smartphone;
- flash whatever custom recovery image appeals to you (the two best ones are TWRP and CWM);
- make backups using these instructions;
- charge the battery that s part of the handset;
- deactivate security programs that run on your phone and on your laptop;
- turn on USB Debugging on the Galaxy Ace 2 GT-I8160;
- install USB drivers for your smartphone on your laptop.
A warning before you upgrade your device: the warranty that comes with it is going to become void at the end of the procedure. Here is what you should do to obtain it back: upgrade the I8160 to Android firmware released officially or try to downgrade the device to stock Android.
Instructions
- Now that you know how to get the warranty back, we give you the first step that will start our guide: download on your PC.
- If the two zip files are settled nicely inside your laptop or comp, you need to leave each of them unzipped and then create a connection between the phone and the notebook via the smartphone’s USB cord. Now you should take the two packages, send them over to the SD card root of the phone and then disconnect the latter from the notebook.
- Once the devices are away from one another, you can switch the handset off and then enter it in Recovery Mode. As soon as you are done with this step, you need to wipe the phone’s system by choosing certain option.
- Here is the first one: Factory Reset/Wipe Data. The second one is Wipe Cache Partition, but you have to opt for it after you are back in the Recovery Menu. Then select the third and last wiping option, namely Wipe Dalvik Cache. Your I8160 should now be wiped out, which means you should opt for Go back.
- This will take you back to the Recovery Menu from where you should choose Install zip from SD card and then opt for Choose zip from SD card.
- [sc name=”banner-jos”]Next on the agenda: select the update file, install it and then repeat what you had to do to get it, but now choose the Google Apps instead. Both upgrade tools are now on your phone, so you should choose the Restart key from the Recovery Menu.
- The Android 4.2.2 Jelly Bean Touchwiz Revolutionised firmware should now feature on your handset; verify it by going to Settings and then selecting About Phone.
IMPORTANT NOTICE: In case the Galaxy Ace 2 I8160 remains in a continuous boot loop, you can get it out of that by doing the following: restart the phone in the Recovery Mode and then, before you reboot it into the firmware, you have to opt for Factory Reset/Wipe Data and then for Wipe Cache Partition.


