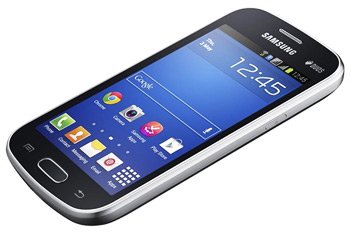
Install Android 4.1.2 XXUANB2 on Galaxy Trend Lite DUOS GT-S7392
Galaxy Trend Lite GT-S7392 will get a kick out of Android 4.1.2 Jelly Bean. As soon as the latter is on your smartphone, you will love it even more! Find out how that can happen by looking at this guide.
You must have the Galaxy Trend Lite DUOS S7392 on the ready. It is the only model that XXUANB2 works with. If you follow our tutorial on a different phone, you will brick it.
The Jelly Bean 4.1.2 and the new XXUANB2 official firmware are available for South Africa and Libya. The firmware came out this past February for the two countries.
The advantages of an update Samsung GT-S7392 are not negligible. You will experience many goodies. Here’s a look at all of them, starting with sync and connect email updates. Other novelties are triple buffering and touch anticipation. Then you’ll get extended Vsync timing and mini apps, together with this: automatic adjustment for the size of widgets. Pop up play, all share and improved keyboard are also among the goodies. You can use free style widget, Google Now, group cast and a fixed frame of 60 fps, too.
The most noteworthy cons about having a rooted handset are these: root access and system partition will be gone. The update, however, will not damage the phone’s important data. Its internal and external SD cards will be safe from harm, too.
Prerequisites
Are you ready for the update? Then follow some requirements for starters, then some steps. For now, let’s see the pre-requisites:
- your laptop must be running Windows, not Linux or other operating systems;
- the battery of your Galaxy Trend DUOS GT-S7392 must sport a fully charged battery;
- the phone’s USB Debugging should be turned on;
- the laptop’s security software, as well as the one on the laptop must be deactivated;
- your notebook needs to run USB drivers compatible with the phone (they are downloadable from here);
- create regular backups and a full NANDroid one, generated with this guide.
Step by step instructions
- The second you’re done with our pre-requisites, you can consider the first step. Which goes like this: download, from this site, Odin v3.09 on the notebook, then do the same with the Android 4.1.2 XXUANB2 official firmware for and .
- Then extract these packages and you will soon remain with many files. One of these is called Odin v3.09.exe, which you must open on the notebook. Only then can you boot the phone in Download Mode.
- The steps to take for this booting should be these: press and hold Home, Power and Volume Down at the same time, then let them go once a boot message comes up; press Volume Up after that to enter the said mode.
- Our next step needs you to do as follows: plug your smartphone to the laptop. To make sure a connection is possible, make use of the handset’s USB cord.
- After that cable is used, you should wait till the Odin pops up with a blue sign. That way you are told that the plugging happened.
- Once there’s a connection between your devices, add the firmware file to the AP / PDA. Up next: activate those boxes labelled F. Reset Time and Auto Reboot. It’s best to uncheck Re-partition, since it’s checked by default.
- To move on, you should click on an option named “Start“. Doing this, you will help install the new firmware on your phone. The flashing will only begin after you tap that. Wait for some minutes to pass.
- When the installation’s finished, the display of your smartphone will have, in green, this message: “Pass“. Disconnect the Galaxy Trend DUOS GT-S7392 from the notebook once the phone begins to reboot. This will end in a bit. Which means the following: unplug the devices from one another, as instructed.
- [sc name=”banner-jos”]You are now left with the XXUANB2 and the novelties of the new OS that can be explored at last. To get full access to the goodies, you must tap Settings. When you’re done, tap, on the same handset, the About Phone option.
Now that the firmware is launched, you should try out all of its features and such. If any of them fails to compel you, the NANDroid backup file is meant to bring the previous ROM back. So use it whenever you want the old ROM back.
Below this tutorial is a comment section. You can leave your questions and so on there.


