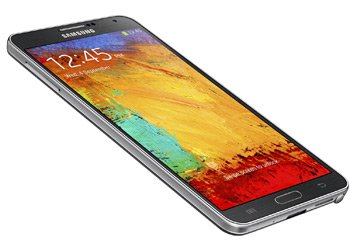
How to Flash Android 4.3 XXUDML3 on Galaxy Note 3 SM-N9005
The UK and Romania are the first two countries XXUDML3 is available for if you want to update Galaxy Note 3 SM-N9005 to Android 4.3. We will help you flash this upgrade if you stick with us throughout this guide. Off we go!
This new stock firmware comes with a wealth of novelties. We should add here no important bugs to affect how the handset performs, a new features as well as new app, a great performance due to the many tweaks and options, enhanced battery life thanks to loads of numerous tweaks, plenty of customization options as being the most important goodies you’ll be able to use.
If you’re more used to Samsung’s KIES, you should know that you can grab the update with it because the new firmware has its KIES logo already turned on for you. Be careful: to apply this solution, your Galaxy Note 3 N9005 must have a stock ROM flashed on it. If you apply our tutorial, you handset doesn’t necessarily have to sport such a ROM (but it’s equally fine if it does).
The two main annoyances that come with the XXUDML3 are these: if the smartphone’s rooted, the system partition will end up erased and root access is going to be revoked from your device. Both the crucial data and internal as well as external SD cards will not have to go through that.
Requirements
Below is what you should do in terms of requirements:
- see how much battery there is left on your handset and, if it’s not too much, charge the unit;
- access USB Debugging and turn this option on;
- the notebook’s and phone’s security software mustn’t be running during the procedure, so disable that;
- create a standard backup (via these tips) and also a full NANDroid one (generated with this tutorial);
- your laptop must be running USB drivers that are compatible with your handset, so download them on it;
- your notebook must come with Windows.
Step by step instructions
- When all of the pre-requisites have been ticked off the list, be sure to download the following packages on your laptop: Odin tool from this location and the Jelly Bean 4.3 XXUDML3 official firmware (you will find the UK EE version ; the Romania Orange variant is ).
- What comes next: find WinZip or WinRar and use one of them to unzip the 2 packages on the notebook.
- Here is how to perform the next task which asks you to enter the Galaxy Note 3 SM-N9005 into Download Mode: simultaneously press and hold Home, Volume Down and Power, then wait till a warning screen pops up; when it does: press Volume Up.
- After being done with the previous task, perform the following like this: open, on the notebook, the Odin as Admin and make sure that your Samsung N9005 and the laptop are connected to each other via the handset’s USB cord.
- The screen should display the following in case a connection is established: a message that reads “Added!!” and a yellow-colored ID:COM box. In case they’re not available, you should proceed to performing one of this alternate actions: be sure to install, again, the USB drivers on the laptop or try again with another USB port.
- Then move on to this next set of necessary guidelines: tap BL, select a file with BL in the name, click on AP, opt for a file with AP in the name, tap CP, opt for a file with CP in its name, tap CSC, choose a file which has CSC in the name, tap PIT and choose a file with an extension called .pit.
- After a short while, some boxes will make an appearance; check only those: Re-partition, F. Reset Time and Auto Reboot. We now ask you to flash the new firmware by tapping “Start” and then having patience so that the procedure can end successfully.
- [sc name=”banner-jos”]When it does, the Galaxy Note 3 SM-N9005 will reboot. The next minute you will notice a “Pass” message coming on the display; this basically means that the phone and the laptop must be unplugged.
After you disconnect the two devices, you have to take a look at the XXUDML3 firmware and make sure you want to keep it on your smartphone. If you don’t, there’s always the option of restoring the previous ROM on your device. For that to work, we need you to use the NANDroid backup file and revoke the upgrade.
Do you need to ask something about the update or you’ve run into problems? You can use the comment field below for that.


