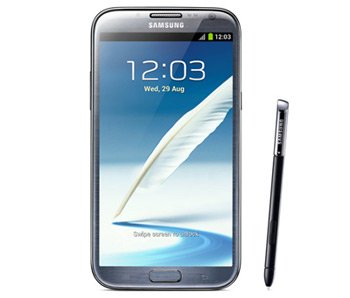
Install Android 4.3 ZCUEML2 on Galaxy Note 2 GT-N7100
ZCUEML2 is allowing us to finally achieve an updated Galaxy Note 2 GT-N7100. Which means that your device will feature Android 4.3 by the end of this post.
This official firmware has just been released for China. Getting it installed on the handset will have lots of benefits. Such as new features, options to personalize the device, no bugs and loads of new apps. You will notice how much the battery will improve so that you can enjoy using your phone more.
Only this model must be used. You will see that using a different smartphone will brick it.
An activated KIES logo lets you upgrade the smartphone with Samsung’s KIES if you want that. In case you opt for it, check whether or not your Galaxy Note 2 GT-N7100 has a stock ROM on it. If it doesn’t, you can’t use the KIES method.
If, however, you wish to follow our tutorial, it’s perfectly OK if the device isn’t running a stock ROM. But be warned: if the handset contains root access, you won’t see it back after the update is done. Besides root access being revoked, your device’s system partition shall be deleted. The new firmware won’t affect the internal/external SD cards and the important data.
Requirements
After you’re aware of the cons which come with an upgrade, here are the pre-requisites you must follow:
- the guide only works with a Windows-operating laptop;
- the battery of the Galaxy Note 2 GT-N7100 should be charged;
- you’ll find, on this page, USB drivers for your handset;
- download them on your notebook afterwards;
- make both a normal backup and a full NANDroid one (generated with this guide);
- USB Debugging must be turned on;
- all of the smartphone’s security software should be deactivated;
- the security programs on the notebook must also be turned off.
Step by step instructions
- Our first stop: download the on your notebook. The second step: download, on the same device, Odin from this page. When both are saved on the notebook, you should unzip them.
- Then move on to this step: enter the device in Download Mode. This is something that will happen only if you simultaneously press and hold Volume Down, Home and Power, wait for a boot screen to pop up and after that press Volume Up.
- Here is what we recommend next: open, on the laptop, the Odin as an Admin. The smartphone and your notebook should be plugged to each other with the USB cable of your Galaxy Note 2 GT-N7100.
- The connection will be established when “Added!!” is shown and a yellow ID:COM box comes up. When they don’t pop up on the screen, your only two alternatives are these: use a different USB port or have the USB drivers flashed on the laptop one more time.
- Should the plugging happen without issues, move on to this set of instructions: tap BL, opt for a file with BL in the name, click on AP, opt for a file with AP in the name, tap CP, then opt for a file with CP in its name, tap CSC, choose a file which has CSC in the name, tap PIT and at the end choose a file with an extension that is known as.pit.
- Tap F. Reset Time, Re-Partition and then Auto Reboot to continue. Now look for “Start” and tap it. When you’ve done that, you will see that the ZCUEML2 enters a flashing stage. The installation will be over as soon as the Galaxy Note 2 GT-N7100 starts to reboot independently.
- [sc name=”banner-jos”]When that stops, the screen of your smartphone will contain a message in a green background; make sure this message reads “Pass“. If it does, you need to go to the two devices and take the USB cord out from between them. This action will make sure that your handset and your notebook are no longer attached to one another.
The new Android 4.3 ZCUEML2 official firmware is, as we speak, on your smartphone. Find it like this: tap Settings and then choose About Phone. When you come across it, launch it. You can now give it a spin to discover any flaws it might have.
In case you think they are more numerous than the pros, you can choose to restore the old ROM. The means for this: the NANDroid backup file. After you use the latter, the phone’s update process will be revoked.
In case of questions, take a look at the comment section below.


