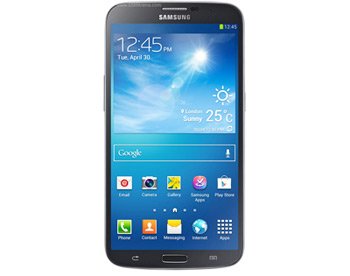
How to Root Galaxy Mega 6.3 i9200 on any Firmware
Samsung Galaxy Mega 6.3 I9200 is easy to be rooted with any kind of firmware meant for it. This phablet offered us by the South Korean manufacturer has a lot to offer if you want to have it quickly and smoothly rooted.
Among the pros of this procedure you will encounter the possibility to experience how root-only apps and custom ROMs work, among many other such advantageous items. Once you grant them access to your gadget, they shall welcome you with an improved performance on all levels. A word of warning first: you should use the guide we worked on specially for today only on your Galaxy Mega 6.3 GT-i9200.
Requirements
In order to start off well, you need to perform some requirements. And they tell you to do as follows:
- charge your phone’s battery if you wish to go through a flawless procedure;
- make backups of the device’s data;
- download, on your notebook, Odin tool from this place and then (file name: UPDATE-SuperSU-v1.34.zip) for your device;
- go to your phablet’s Settings, open Applications, opt for Development and then choose USB Debugging (because this option must be turned off to ensure the success of this guide).
From the bunch of pre-requisites above you should proceed to the steps that will root your i9200. So that you will not be troubled by issues, you have to respect all of the guidelines you will see lined up below.
Instructions
- And off we go. After the Rooting Package and the other package is on your PC, you should extract the former and then launch the Odin tool on the latter device.
- After that file is open, you need to switch the phablet off and boot it into Download Mode by following these steps: hold Volume Down and Menu at the same time while turning the Galaxy Mega 6.3 on again; you should soon stumble across a robot painted in green, which is the Download Mode you needed to reach, so let go of the keys we indicated earlier.
- After that is done, you have to take hold of the phone’s USB cord. It is going to work as a way to connect your GT-i9200 to your laptop, so use it for that purpose.
- Now be sure to do the following: wait until an ID:COM section becomes yellow, because if it does, then the necessary drivers have finally been flashed and you can afterwards click on Odin.
- Then opt for a .tar file (the same one that is part of the Rooting Package). As soon as the file has been chosen, your task will be this: tap START. The rooting is going to begin after you do that and it shall need about 5 minutes to be fulfilled.
- [sc name=”banner-jos”]Now that the Galaxy Mega 6.3 is a rooted phablet, it is going to start rebooting. Once the process is over, you should unplug the smartphone from your notebook.
- To see if the i9200 is truly rooted, you have to go to Google Play Store and download Root Checker. This app will then tell you if you have a rooted phone or if you have to re-do the guide for a second time.
NOTE: To help the smartphone get unstuck from a “Welcome screen” problem, you need to perform this:
- turn the phone off;
- turn it back on;
- repeat the tutorial.
If the Galaxy Mega 6.3 is stuck in boot loop instead of a “Welcome screen”, then do exactly what you did for the other problem. Then your i9200 will be all fine and dandy again, so you can enjoy it to the max without worrying anymore!


