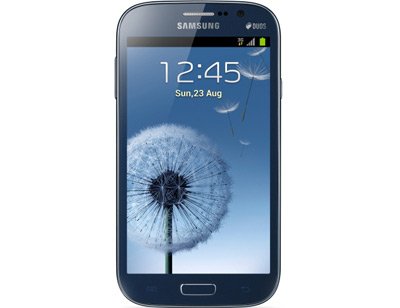
Update Galaxy Grand Duos GT-I9082 to Android 4.2.2 XXUBMK5
Another update guide, another smartphone. Today it’s all about Galaxy Grand Duos GT-I9082 and how to get Android 4.2.2 on it.
For this, we will use XXUBMK5, a recently released firmware for Poland and Russia (“recently” as in January). For all of those interested in how to upgrade their phone to the latest Android version, we urge you to only use the Grand Duos GT-I9082. That’s because another model will end up bricked if you use this firmware on it.
A rooted Galaxy Grand Duos will not fare well with the new firmware. The latter will end up with its system partition deleted and with its root access revoked. Nonetheless, you won’t lose your important data or risk damaging the handset’s internal and external SD cards.
The novelties
Since the new ROM comes with an activated KIES logo, you can, if you want to, update the phone with Samsung’s KIES. To be able to do that, however, your Samsung I9082 will need a stock ROM running on it.
As for what goodies await you as soon as the new firmware is installed, here’s a look at them: a new set of sounds for wireless charging and low battery bug fixes, no Bluetooth audio streaming bugs, the possibility to long-press the WiFi and Bluetooth icons in Quick Settings so that you can easily toggle the on/off state, USB debug white-list, a new Gallery app with superior speed when loading and a whole new set of download notifications.
Requirements
You should prepare for their arrival by first having a glance at these pre-requisites:
- be sure to create several backups (a normal and a full NANDroid one, too);
- install, on the notebook, USB drivers (those that work only with your handset and available here);
- your handset must have USB Debugging enabled;
- use only a laptop that sports Windows;
- fully charge the battery on your handset in case the battery icon is displaying low charge levels;
- if both the notebook’s and handset’s security software are running, turn them off while you follow our tutorial.
Step-by-step instructions
- Now for the actual tutorial with the first step to perform: go here to download the Jelly Bean 4.2.2 XXUBMK5 and find for download on your laptop. Then get Odin downloaded on the same device, from this page.
- After these are saved on that notebook, use WinRar or WinZip to unzip their content and then boot your Galaxy Grand Duos GT-I9082 into Download Mode. The easiest method to use for this is the following: press and hold, together, Volume Down, Home and Power, look for the icon of Android to pop up and press Volume Up as soon as you spot it on the screen.
- What needs to be done now is the following: create a connection between the handset and your laptop with the USB cord belonging to the former.
- Wait until the Odin finds the phone, then for “Added!!” and an ID:COM in yellow to pop up. If they don’t, no connection has been established and you have to use another USB port or install those USB drivers on the notebook once more.
- You will then have to perform these tasks: tap BL, select a file with BL in the name, click on AP, opt for a file with AP in the name, tap CP, opt for a file with CP in its name, tap CSC, choose a file which has CSC in the name, tap PIT and choose a file with an extension called .pit.
- The next step will require you to check the boxes labelled Re-partition, F. Reset Time and Auto Reboot, then tap “Start” to begin the flashing of the new Jelly Bean 4.2.2 firmware on your handset.
- You will then be asked to wait till the new firmware finds itself on the Galaxy Grand Duos GT-I9082. When it does, the latter shall restart. Once its screen displays, in a green background, a “Pass” message, you will need to unplug the phone from your laptop.
- [sc name=”banner-jos”]Once the USB cord is taken out, you should look for the new firmware like this: tap Settings, click on About Phone and locate the XXUBMK5.
After you come across it, give it a spin and see if you accept it as the new tool. If you don’t, we recommend this: restore the previous ROM with the help of the NANDroid backup file. Apart from restoring the previous ROM, this method will revoke the update procedure.
Tell us below if you run into problems or you wish to ask us something.


