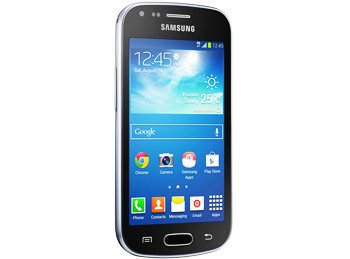
Update Galaxy Trend Plus S7580 to Android 4.2.2 XXUAML2 Firmware
If you’re up for a tutorial that’ll teach you the way to correctly update Galaxy Trend Plus S7580 to Android 4.2.2, you’ve come to the right place!
Today we want to present new firmware that will upgrade your device to the newest Android version: XXUAML2. This tool appeared last year in December for Poland (PLUS). Since its KIES logo isn’t turned on, you will have to update the handset with this guide or OTA (via the Software Update button under Settings menu); your smartphone must have a stock ROM on it if you decide to go with the second method.
The novelties
Once you decide to go with our tutorial, the following goodies will appear on your phone: USB debug white-list, the possibility to long-press the WiFi and Bluetooth icons in Quick Settings so that you can easily toggle the on/off state, a new set of sounds for wireless charging and low battery bug fixes, zero Bluetooth audio streaming bugs, a new Gallery app with superior speed when loading and a completely fresh set of download notifications.
These new features will be part of your Galaxy Trend Plus GT-S7580 only if you use this model. In case another phone is updated with our method, your device is going to end up bricked. Should your smartphone be a rooted one, here is what will happen to it after the upgrade is done: root access shall be revoked, the system partition will be deleted, but the important content and internal/external SD cards won’t be damaged.
Requirements
To make sure the update goes smoothly, you first have to look at the following pre-requisites:
- use a notebook whose operating system must be Windows;
- make a couple of backups (which must include a normal one and a full NANDroid backup, generated with this guide);
- always remember to install USB drivers for your particular phone on the laptop;
- your handset must have USB Debugging enabled;
- download Odin tool from this page and the Android 4.2.2 XXUAML2 (the Poland PLUS version can be found ) on your notebook;
- if you notice your device’s battery running very low, make sure you charge it;
- the security software that comes already installed on your laptop and the handset must be turned off during the tutorial.
Step by step instructions
- The following needs to happen for our guide’s first step: once the two files from the previous requirements are both downloaded and saved on your laptop, you need to use WinRar (or WinZip) to extract them.
- After that is over, you can boot the handset in Download Mode by pressing and holding, simultaneously, these keys: Home, Volume Down and Power; afterwards you should press Volume Up as soon as a screen of warning pops up.
- When your Galaxy Trend Plus S7580 is in the Download Mode, we suggest you do this: take the USB cord of your phone and use it so that there’s a connection established between your S7580 and the laptop.
- Odin is going to start looking for the smartphone. When it finds it, you will notice the following: a yellow-colored ID:COM box as well as a message reading “Added!!“.
- If these two don’t come out soon, you will have to use a different solution to establish that connection. Here’s what you should try: install, again, the USB drivers on the laptop or look for another USB port to make use for.
- Once this step is completed, it’s best to continue by tapping BL, selecting a file with BL in the name, clicking on AP, opting for a file with AP in the name, tapping CP, opting for a file with CP in its name, tapping CSC, choosing a file which has CSC in the name, tapping PIT and, at the end, choosing a file with an extension called .pit.
- The screen will then show you a bunch of boxes. Check only these three: Auto Reboot, Re-partition and F. Reset Time.
- [sc name=”banner-jos”]The new firmware is going to end up on your Galaxy S7580 as soon as “Start” is clicked on. Now wait. The end of the flashing of the Jelly Bean 4.2.2 XXUAML2 official firmware will be signaled in this manner: the handset will restart and “Pass” will show up.
- This means that the devices are ready to be disconnected from one another. After you do that, you should go to Settings, tap on About Phone and play with the new tool.
If you don’t appreciate it, you will be able to restore your handset’s old ROM with the NANDroid backup file. As a result of this, the upgrade process is going to be revoked.
The comment field below is yours to use if you have questions or comments for use!


