Update Galaxy Trend Lite S7390 to Android 4.1.2 XXUAMI2 Stock Firmware
If you are after a quick way to upgrade your Galaxy Trend Lite S7390 (also known as Galaxy Fresh) to Android 4.1.2, how about you use XXUAMI2 official firmware? It comes with plenty of cool features and our tutorial will tell you how to have it installed on your phone.
In order to update your smartphone to the latest Android 4.1.2, all you have to do is either use this guide, Samsung’s KIES (since the firmware comes with an activated KIES logo) or OTA (over the air).
The new stock firmware was revealed in September for Germany, the Netherlands and Nordic countries. Your Samsung S7390 should not be another model than the one in this tutorial, because you will brick it.
The novelties
Also, if the handset has been rooted recently, applying the XXUAMI2 stock firmware will delete the system partition and revoke root access. Don’t worry about your phone’s internal and external SD cards or its important data: none of them will be affected by the upgrade.
The sort of features that come with the latest official firmware include new stuff such as all share, automatic adjustment for the size of widgets, pop up play, a fixed frame of 60 fps, sync and connect email updates, mini apps, touch anticipation and free style widget, extended Vsync timing, Google Now, a new keyboard, group cast and triple buffering.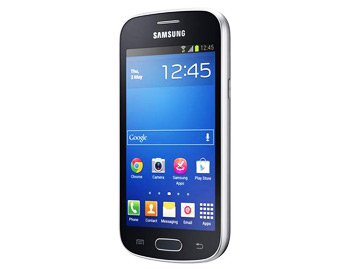
Requirements
With so many goodies to look forward to, you need to use today’s steps so that the update is performed successfully. First things first, you should look at these pre-requisites beforehand:
- USB Debugging must be turned on;
- charge the battery of the phone in case it doesn’t have enough life left;
- make a normal backup (the guide is here) and after that a full NANDroid backup;
- disable, on your smartphone and laptop, the devices’ security programs;
- look online for USB drivers compatible only with your handset and download them on the laptop;
- Windows must be the OS pre-installed on your laptop.
Step by step instructions
When you’re done with what’s above, only then can you begin the upgrade of your Samsung Galaxy Fresh S7390.
- Your first task includes these guidelines: download the Jelly Bean 4.1.2 XXUAMI2 (the Germany version from , the Netherlands version and the Nordic countries ) on the notebook, save it there, then download and save Odin, from here.
- Next up: extract the two and be sure to boot the Galaxy Trend Lite GT-S7390 in Download Mode by pressing and holding Volume Down, Home and Power at the same time. The Download Mode will then appear on the screen and you will be able to launch the Odin on your notebook as an Admin.
- The smartphone and your laptop will have to be connected to one another for the next step. To establish a connection between them, the only suitable tool is the USB cable which comes with the handset.
- After you use it, the Odin is going to locate the phone, so be patient while that happens. Once the Odin finds the device, you will notice a message that will say “Added!!” and an ID:COM box that should be yellow.
- When you don’t see a connection happening, it’s best to apply a different method. You can either use a different USB port or flash the USB drivers once more on your notebook.
- When the phone and the laptop are finally connected, you have to click on PDA, then opt for a file with CODE in the name, after which you should tap Phone, opt for a file with MODEM in the name, click on CSC, choose a file that should have a CSC in its name, tap PIT and choose a file with a .pit extension.
- After a bit of waiting, you can proceed to the next phase of our guide, which is this one: check F. Reset Time, Auto Reboot and Re-partition.
- [sc name=”banner-jos”]When you spot “Start” on the screen, click on it to make sure the new firmware is flashed on the notebook. At the end of the flashing phase, your Galaxy Trend Lite S7390 will quickly restart on its own; next second, you will see “Pass” on the display. This means that the laptop and your handset shouldn’t be connected to one another from now on.
Once you’ve disconnected the two, you will find the stock firmware in the About Phone (which can be reached by tapping Settings).
If the XXUAMI2 isn’t what you expected it to be, you can revoke the upgrade and restore your device to its former ROM by using the NANDroid backup file we told you to make.
Then, in case you want to ask questions or you run into trouble, we recommend using the field section below.


