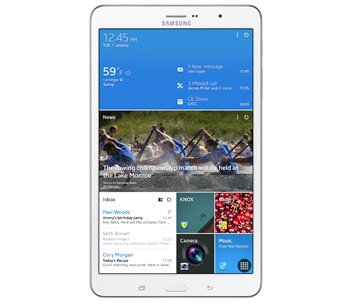
How to Update Galaxy Tab Pro 8.4 SM-T320 to Android 4.4.2 XXU1ANB1
You are able to update Galaxy Tab Pro 8.4 SM-T320 to Android 4.4.2 KitKat with the help of some steps. Each of them will bring you closer to this OS, so be sure to follow this guide.
For today we will use XXU1ANB1. This official firmware, launched this month, is now available for the following countries: Finland and Portugal.
There are many reasons why you should update your tablet. The first of them: no more problems with bugs, because they won’t be present. The second of them: new goodies. Speaking of which, here they are: improvements in terms of security, battery tweaks to help it run more and no App Ops application. You will also get to play with various customization tweaks and performance boosters.
As usual, we must urge you to only use the Galaxy Tab Pro 8.4 SM-T320 for the update. If you own another tablet and you upgrade it with this guide, you will damage it.
A rooted gadget, in this case the Samsung T320, will have problems because of the update. Which problems include the system partition being deleted and root access becoming revoked. Your tablet will be able to keep the following safe: internal/external SD cards and important data.
Prerequisites
The flashing of the new firmware requires some preparations first:
- deactivate, on your notebook, all of the security solutions;
- use a laptop which sports Windows;
- create backups using one of our tutorials;
- be sure to also create a full NANDroid backup;
- you must also download, on your laptop, USB drivers which are supported by the Galaxy Tab Pro 8.4 SM-T320;
- your tablet’s battery must be fully charged;
- turn off the security software used by your tablet;
- an option called USB Debugging must be activated on your tablet.
Step by step instructions
- The KitKat 4.4.2 XXU1ANB1 for Finland is available . The version required for Portugal (TPH) . Depending on your region, click on one of these versions to download them on your notebook. Go to this place and download Odin on the same device. Save them both, then unzip them with WinRar.
- After this, make sure to boot the tablet in Download Mode by simultaneously pressing and holding Volume Down and Power, then pressing Volume Up when a screen containing a warning comes up.
- In order to open the Odin as Admin, do this: right-click, with your mouse, on .exe file and make sure you tap “Run as Administrator” next. After that you should connect the tablet to your notebook.
- For a smooth connection, we recommend using the tablet’s USB cord. In a matter of minutes you should notice the appearance of a message saying “Added!!“.
- After that you should see an ID:COM box turning yellow. If both happen, that’s ideal. But if the connection isn’t established, install the USB drivers once more or use another USB port.
- As soon as everything goes well, click on BL, after that choose a file with BL in the name and then tap AP. Up next: opt for a file containing AP in the name, tap CP, choose a file with CP in its name, tap CSC, choose a file which has CSC in the name, click on PIT and select a file with an extension called .pit.
- You are now free to go to the next step. This one needs the following from you: activate Auto Reboot, Re-partition and F. Reset Time.
- We suggest tapping “Start” after the necessary boxes have been selected. By tapping this option, the new firmware will enter a flashing phase that won’t last long.
- So make sure you wait for a short while. You should then see the tablet restart and its screen display “Pass” in green. Now that this has happened, do this: remove that USB cable. The tablet and the notebook must be unplugged from each other.
- [sc name=”banner-jos”]When done with this step, continue by going to Settings on the Galaxy Tab Pro 8.4 SM-T320. Then tap About Tablet. XXU1ANB1 will appear in front of your eyes, so select it and use it from now on.
The firmware may prove disappointing. If that happens, you can use the NANDroid backup file. This one is going to bring you the old ROM. The upgrade will be revoked if you do this.
If there are problems you wish to report, use the comment section below.


