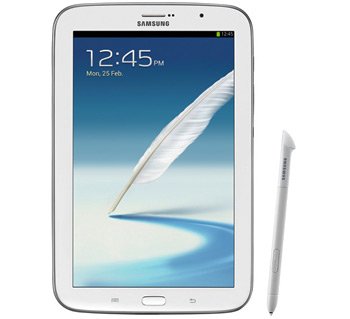
Update Galaxy Note 8.0 N5210 (LTE) to Official Jelly Bean 4.2.2 XXCMG7 firmware
If you’ve thought of upating your Galaxy Note 8.0 N5210 LTE to Android 4.2.2 Jelly Bean XXCMG7 but haven’t stumbled across a suitable guide, maybe ours will help you.
The firmware comes from the phablet’s own manufacturer, so everything in it is bug-free. Other than that, you will be shown multiple methods via which your device will bring an improved user experience overall.
Requirements
Before we present you with those steps that shall deliver the update faster, you need to acknowledge the requirements underneath:
- make a backup using the same method as usual;
- charge the battery of the phablet;
- stay away from our tutorial if the device you own is a different one than the Galaxy Note 8.0 GT-N5210 LTE;
- turn on USB Debugging;
- download (file name: N5120XXCMG7_N5120BTUCMG7_BTU.zip) and Odin tool v1.85 on the PC;
- use the factory unlocked Galaxy Note 8.0 N5210 LTE model;
- download and install, on your laptop, USB Drivers for your handset.
As soon as the part above has been read carefully, you should proceed with the update process as shown in the steps you will observe below. But first: you have to be aware that, in case the gadget has been previously rooted, it is going to loose that. Which means you should root it again after the guide is nearing the end.
Instructions
- We can now safely begin the tutorial by asking you to extract the content of the Jelly Bean 4.2.2 N5210XXCMG7 somewhere good; like for example your notebook’s desktop.
- Then boot the phablet into Download Mode after you’ve turned it off. To safely enter that mode, you need to do as follows:
– simultaneously press and hold Volume Up and Power;
– the latter will kick start the appearance of Android’s logo;
– a message with a triangle in it will also pop up on the screen;
– press “Power”;
– you are in Download Mode at last. - Go to the notebook and find Odin. Open it afterwards. Now do the following: connect your N5210t to the laptop and you will know if the plugging truly happened if you witness one of the following:
– an ID:COM box going all yellow or blue;
– a message saying “Added!!” will come up on the display. - But if the connection was not as successful as you’d have expected it to be: choose a USB port that is different to the one you previously used or install the USB Drivers one more time. Then, when that is over and done with, you should go with these instructions:
– tap PDA;
– opt for a CODE-named file;
– tap Phone;
– select a MODEM-named file;
– tap CSC;
– opt for a CSC-named file;
– tap PIT;
– select a file with a .pit extension in its name. - [sc name=”banner-jos”]Wait for a particular group of boxes to appear on the screen. Then look for the following and opt for them: Re-partition (if you chose the .pit file), F. Reset Time and Auto Reboot.
- The flashing of the Android 4.2.2 Jelly Bean XXCMG7 shall commence once you’ve tapped START. Have patience after the flashing has begun.
- You shouldn’t have to wait more than 15 minutes; if you do, though, you need to repeat the tutorial. The end of the flashing phase is going to make your phablet reboot. Wait until it comes with the home screen; after that happens, you can unplug the Galaxy Note 8.0 N5210 LTE from the notebook. The firmware this device needed for the update is now on it.


