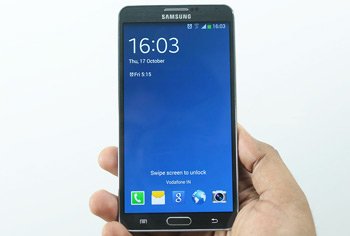
How to Update Galaxy Note 3 Neo SM-N7505 to Android 4.3 POUBND2
Should the battery on your Galaxy Note 3 Neo LTE SM-N7505 last for fewer and fewer hours or you want to customize the phone, you should update it to Android 4.3. Our tutorial will enable you to perform the procedure on your own without issues. So go for it!
New firmware is available for your phone. Jelly Bean 4.3 POUBND2 has just been released for France. There’s no other model that can be used with this firmware, so make sure the device you use if the Samsung SM-N7505. In case of a different phone being upgraded with this firmware, you will end up with a bricked device.
The Jelly Bean as an OS can show you many great goodies. Combined, they enable superior performance on all accounts, new apps, tweaks for customization and more. Your smartphone won’t be affected by bugs and other security problems.
But the procedure is impossible to perform if you want to use KIES software. Whenever a KIES logo is turned off, the user of a gadget can only install new firmware with a special guide or through OTA. Should you go for the latter, your Galaxy Note 3 Neo N7505 must sport stock ROM in advance. When no such thing is possible, there’s our tutorial to turn to; we don’t ask you for stock ROM.
Even with this OS and its novelties on-board, your phone will suffer if rooted. The upgrade will mess with its system partition, which will be erased, and its root access, which will become revoked. No damage will affect the handset’s important data. Its internal / external SD cards will still be usable, too.
Prerequisites
For the next couple of minutes you should look at these pre-requisites:
- consider saving the phone’s data by making backups;
- a full NANDroid backup should be created, too, via these instructions;
- consider charging the smartphone’s battery if it’s almost empty;
- Windows is the OS your laptop must be equipped with;
- your notebook should feature USB drivers fit for the phone (they are ready to be downloaded from here);
- return to your handset and disable its security options;
- the Galaxy Note 3 Neo LTE SM-N7505 must have its USB Debugging enabled;
- the security programs on the laptop need to be disabled, too.
Step by step instructions
Next up, you will have to start the installation of the new update file.
- The first thing to do is easy: download Odin v3.09 from this page and the on the laptop. The latter will need to have each of the packages’ files unzipped on it. Extract them all with WinRar, then search for one of them in particular, because it needs to be launched on the laptop. This file is Odin v3.09.exe.
- Your Galaxy Note 3 Neo LTE SM-N7505 is required to enter Download Mode. This is done by applying the following method: press and hold, together, Home, Power and Volume Down, release them once a boot message gets delivered, then be sure to press Volume Up.
- If the phone’s restarted via these instructions, you should establish a connection between it and the laptop. The phone’s USB cord is the means of creating this plugging. In a matter of mere minutes, Odin is going to come with a blue sign.
- Now that there’s a connection between the devices, add the firmware file to AP / PDA. You are now asked to check F. Reset Time and then uncheck Re-partition. After that, make sure Auto Reboot is also checked, then click on “Start“.
- The Android 4.3 POUBND2 will very soon enter the installation part. For it to end, wait approximately 13-15 minutes. The smartphone will afterwards pop up a message that says “Pass” in green.
- Following this, the device is going to automatically restart and, when it’s done with this phase, disconnect it from the laptop. The USB cable must be taken away from your devices for this unplugging.
- [sc name=”banner-jos”]The phone is now featuring the update tool and the new Jelly Bean. To make sure you fully enjoy its benefits, launch it as shown here: tap Settings on the handset, then About Phone.
For now, see if the OS rises up to expectations. When it does not, be sure to find the NANDroid backup file. With it on the phone, the previous ROM will be easy to get back. After the old ROM is restored, the update process will be a thing of the past.
If there are things you don’t understand about the procedure or you encounter problems, don’t be afraid to drop questions in the box below.


