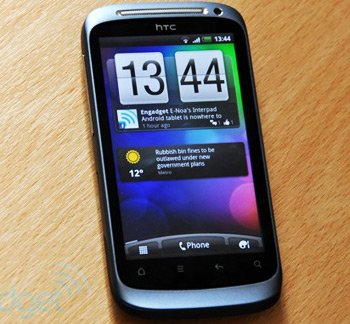
Install Jelly Bean 4.2.2 on HTC Desire S via Avatar Custom ROM
Avatar custom ROM firmware can make your HTC Desire S an awesome smartphone. Not that it’s not one right now, but as soon as you experience this tool, your handset will display many new additions, such as tweaking options, custom ROMs, better battery and all the other stuff which makes a smartphone desirable. The greatest addition of them all: Android 4.2.2 Jelly Bean.
Since the firmware this tutorial contains is the Avatar ROM one, you are going to be welcomed by everything that makes CM10.1 sought after: new apps, new features and the like. If what we described here makes you long for the new ROM on your handset, what’s left for the next half an hour (or less, if you aren’t a newbie) is to get in touch with the pre-requisites and the steps that are sure to bring the upgrade on your device.
Requirements
Requirements come first and they look something like this:
- root the HTC Desire S;
- download on the laptop you have with you (file name: OTA_4_10-3-13.zip);
- make a backup using this method;
- charge the battery that gives life to your smartphone;
- download Google Apps from here on the laptop;
- turn on USB Debugging by opening Settings, launching Applications, open Development and choose the USB Debugging option;
- go to the phone, disable the security programs installed on it, then go to the notebook and turn off its own security software;
- get USB drivers for this phone on your notebook or PC.
Then, when all the above requirements have been carefully performed, you will be left with the update steps that are lined up neatly underneath.
Instructions
- According to the first step, you will be required to leave the Google Apps and the other update package unzipped. Then you will need to use the phone’s USB cord as a means to connect the Desire S to your laptop.
- If you don’t come across “Added!!” or an ID:COM box port wearing yellow, the connection hasn’t happened; to make it happen, you need to look for a different USB port to use or get the USB drivers flashed on your notebook one more time.
- If you haven’t encountered problems with the plugging, you can move the files that are on the notebook to the SD card root of your Desire S and then disconnect the devices.
- Switch the handset off, enter it in Recovery Mode and do as follows: opt for Factory Reset/Wipe Data, Wipe Cache Partition and then choose Wipe Dalvik Cache.
- [sc name=”banner-jos”]Now go back to the Recovery by applying Go back; then opt for Install zip from SD card; next, select Choose zip from SD card and the OTA_4_10-3-13.zip you need for the upgrade.
- Install the latter file by tapping “Start“, then apply the same steps as above to install the Google Apps file instead. Once you verify the presence of the two files on the phone, you should opt for the restarting option and wait for it to reboot the handset. Then enjoy the Jelly Bean 4.2.2 Avatar custom ROM on HTC’s Desire S; which, by the way, is in your device’s “About Phone“.
When you find the firmware, feel free to use it asap! However, sometimes this thing may happen: the handset is stuck in boot loops. Never fear, we have a solution: boot the phone in the Recovery Mode, then, before you restart it, choose Factory Reset/Wipe Data and also Wipe Cache Partition.


