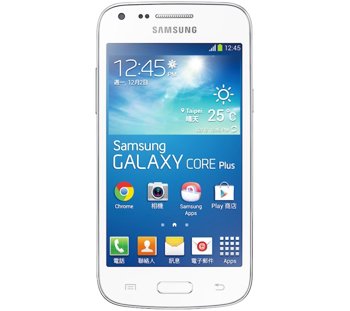
How to Install Android 4.2.2 XXUANB1 on Galaxy Core Plus SM-G350
Galaxy Core Plus SM-G350 is on our page for good reason: XXUANB1 official firmware became available for it. Which can mean only one thing: prepare your smartphone for Android 4.2.2!
The release of this new tool happened last month. The countries that can already use the new firmware are the Netherlands, France and Bulgaria. Baltic is another region fit for today’s update tutorial.
Speaking of which: we must remind you that the only smartphone we admit for our guide is the Galaxy Core Plus SM-G350. Stay away from another model, because you will brick it if you update it with this firmware!
The novelties
Now that you know what firmware and handset to use, let’s discover the advantages of the XXUANB1. They are best described by the following goodies: a new set of download notifications, a new Gallery app and a USB debug white-list. The list can go on: a much improved set of sounds for wireless charging and an option to long-press the WiFi Bluetooth icons in Quick Settings in order to be able to toggle the on/off state. Bluetooth audio streaming has been enhanced. Other goodies: low battery bug fixes and many customization possibilities.
An upgrade performed on a rooted Galaxy Core Plus G350 also means trouble. That’s due to the fact that the system partition will end up deleted and root access will become revoked in the end. Thankfully, your smartphone’s internal / external SD cards and important content will escape damage.
There is no activated KIES logo, so choose between OTA or our guide if you want the update. Should you go for the first option, then use a Galaxy Core Plus SM-G350 with custom ROM. Our tutorial doesn’t need that.
Prerequisites
To follow our guide instead of the OTA method, you should read these pre-requisites before anything else:
- besides saving your phone’s data with backups, create a full NANDroid backup, too;
- charge the battery inside your smartphone if charge levels are low;
- deactivate the security software present on the handset, then the one on your laptop;
- make sure you turn on USB Debugging on your phone;
- download, from here, USB drivers for the handset on the notebook;
- use a laptop running Windows.
Step by step instructions
If you’ve done everything we told you to do above, you’re ready to install this stock firmware on your phone.
- Commence the process with this task: after you download the Jelly Bean 4.2.2 XXUANB1 for Bulgaria for France from this and the Netherlands version on your laptop. The download Odin v3.09 as well.
- You will then have to do this: unzip each of the packages, then launch, on the notebook, the Odin v3.09.exe.
- What you have to do next is easy: press and simultaneously hold Home, Power and Volume Down simultaneously, then see if there’s a boot screen coming up; if yes, you need to press Volume up now and your smartphone will end up in Download Mode. Then take the phone’s USB cord to ensure a plugging between the handset and your laptop.
- A plugging will occur only after a couple of minutes of waiting are over. Have patience, then, till a blue sign is shown in the Odin. This will tell you that a connection has finally been established.
- After this phase is over, you have to move the firmware file over to AP / PDA. Do this next: check Auto Reboot, check F. Reset Time and then uncheck Re-partition. If you’ve completed all of the previous actions, tap “Start”.
- Very soon you will see the new firmware being flashed on your Galaxy Core Plus 3 SM-G350. The end of the installation will happen as soon as “Pass” pops up in green and your handset reboots after displaying this message.
- Now prepare to have the smartphone unplugged from your notebook. The unplugging should happen like this: remove the USB cable from your two devices.
- [sc name=”banner-jos”]The presence of the new firmware can be verified like this: tap Settings on the handset, then About Phone. If the XXUANB1 is there, launch it. If it’s not, repeat the tutorial.
After you open the firmware, we recommend experimenting with it for a while. You may not like it, so it’s best to give it a try first. In case you don’t see its hype, get the old ROM back on by using the NANDroid backup file. A drawback when it comes to using this file is that the update will be revoked.
Drop us your questions in the box below!


