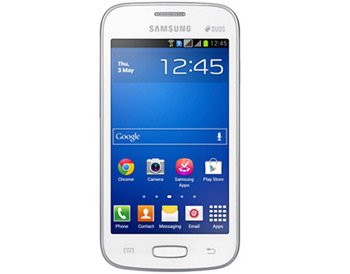
How to Install Android 4.1.2 XEUAND1 on Galaxy Star Pro GT-S7262
You don’t know what you’re missing out on if Galaxy Star Pro GT-S7262 doesn’t have an Android 4.1.2. You definitely have to give this version a try. Especially if you want better battery, new apps, customization options and other benefits. If all of this sounds tempting, we have an update guide for you!
Jelly Bean is brought on your smartphone with the addition of this firmware: XEUAND1. Which has been released this month for Ukraine (Kyivstar), Uzbekistan, Kazakhstan and Russia. If your device is missing this OS, best get it as soon as you can. However, only the Galaxy Star Pro GT-S7262 is the device this firmware’s been launched for. Any other handset version will get damaged if this official firmware finds itself on it.
The novelties
Here’s the stuff that’s meant for your smartphone: extended Vsync timing, all share and pop up play. These, however, are not all of the novelties. The list continues with a fixed frame of 60 fps and Google Now. There are also a bunch of other goodies, such as group cast, mini apps and a new keyboard. The upgrade will come up with automatic adjustment for the size of widgets, too. Another set of goodies is made up of these: touch anticipation and triple buffering. Sync and connect email updates as well as free style widget will land on the handset, as well.
But your device’s going to have to deal with a deleted system partition once the update’s performed. Another con resulting from this procedure is this: root access will be revoked. Nothing wrong will happen to the smartphone’s content and data.
Prerequisites
You should now get through these requirements:
- the security programs on your smartphone and your laptop have to be deactivated;
- Windows must be sported by your laptop;
- charge the battery of your Samsung S7262;
- enable, on the smartphone, USB Debugging;
- download, from this place, on your notebook;
- if, however, you’re living in the , download the file compatible with your region on the same laptop. The and versions are also available for download;
- go here and find Odin v3.09;
- download it on your laptop;
- go and download, on your laptop, USB drivers that are available for your phone;
- create a regular backup;
- then make a full NANDroid one by using this tutorial.
Step by step instructions
- The first step which we have for you tells you to extract the XEUAND1 stock firmware on the notebook. After this procedure is done, do the same for the Odin archive and Odin v3.09.exe will come up. Your job will be to launch this particular file on the laptop.
- Coming your way your way is this task: restart the phone in Download Mode. The shortest way of doing that: press and hold Home, Power and Volume Down simultaneously, stop when a boot message pops up, then press Volume Up.
- There has to be a plugging done next, and it includes your GT-S7262 and the notebook. For this connection to be established between the devices, the handset’s USB cable will play a major role. Soon afterwards, the Odin is going to begin its search for your smartphone. When it’s been found, the same Odin will display a blue sign. It’s always best to redo these steps if no connection’s been created.
- The firmware file must be added to the AP / PDA next, then you will be asked to check Auto Reboot, F. Reset Time and uncheck a Re-partition box. Here is how to actually begin the flashing of the new firmware: click on an option called “Start”.
- Once the installation begins, the only thing to do will be to wait till the smartphone alerts you of the process’s end. The Android 4.1.2 XEUAND1 firmware has now found its way on your handset after the latter shows “Pass” in green and begins to automatically reboot.
- [sc name=”banner-jos”]Wait until that happens, then unplug the Galaxy Star Pro GT-S7262 from your laptop and tap Settings on the handset. Now be sure to tap About Phone. This is how you’ll be able to launch the novelties of the new operating system.
There’s only a thing to be done if the latest firmware doesn’t look great. Here it is: restore the previous ROM by way of the NANDroid backup file. Then wait for the phone’s upgrade process to be revoked.
Your comments and questions can be directed at our comment box underneath today’s guide.


