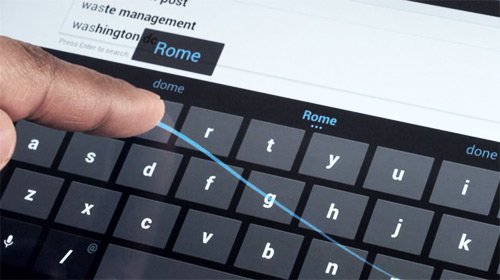
Guide: Manually install the Android 4.2 Gesture Keyboard APK
Many fans of Google and their creations have patiently (more or less) waited for news on something fresh from this company. And their wait has recently been made worthwhile by the new Android 4.2 Jelly Bean operating system.
This version got people excited ever since it was first announced awhile back. Because it promised user many exciting features, options and so on. From what we experienced, it didn’t disappoint. Among these features is something called Gesture Typing. The advantage of this option is the following: you can practically can write using the finger in a unusual way: you can move it over the letters on whatever gadget you own.
Requirements
But
here’s the catch (which can be overridden, as usual): Gesture Typing is supported on phones, tablets and so on that are made to sport the Android 4.2. One member on XDA Developers found a solution to that. With his help, you will be able to install the Android 4.2 Gesture Keyboard APK on any gadget you use via a manual installation guide. But that device will need to go through certain requirements. First of all, you will need a computer/laptop besides your smartphone/gadget/etc. 
Then check if the gadget is rooted or not. For that, you can use the Root Checker application, available online, in Google Play; then check the status of the battery: is it fully charged or only 60%? If the latter holds true, charge the gadget till its battery is full. Then, final prerequisite, activate the USB debugging. To do this, go to Settings, then Development Options. Another thing: this version is not officially launched by Google, so if you do any of these things, you are at your own risk.
Important instructions
Now it’s time to get to the actual operation. Which is made of some crucial steps you must follow accordingly.
- The first of them is the following: get the default Keyboard APK file/Android 4.2 Stock version to a laptop or comp, then connect the gadget you want via a USB cable to the laptop where you have the copied files.
- For the second step move the downloaded files from the PC to the gadget memory card.
- Step 3: disconnect the handset/tablet/etc from your laptop.
- [sc name=”banner-jos”]For step number 4 you have to use the file manager and to select the APK archive, then execute the file to manually launch the installation process.
- The fifth and last step goes in this manner: once the app is installed, go to an option labeled Compose New Message. After you’re done, keep your finger pressed on field area; this will help the device to show you the new keyboard access. You can obtain the same thing if you access the Settings interface.
As usual, you can experience issues. If that happens, the best thing you need to do is to reinstall the keyboard using the command prompt. For that you must connect the gadget to your PC via the usual USB cord. Open the command prompt using the Start >Cmd method, then enter these lines via the command prompt:
- adb remount
- adb push LatinImeGoogle.apk/ system/ app/
- adb shell chmod 644/ system/app/LatinImeGoogle.apk


