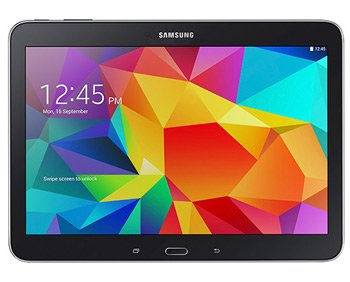
How to Flash KitKat 4.4.2 XXU1AND8 on Galaxy Tab 4 10.1 3G SM-T531
If you’re always on the lookout for new stuff destined for Galaxy Tab 4 10.1 3G SM-T531, you’re about to discover that in this post!
The novelty we mentioned is Android 4.4.2 XXU1AND8. This firmware, meant for Russia and Trinidad&Tobago, was launched earlier this month. Only for the Galaxy Tab 4 10.1 3G SM-T531, mind you. The firmware is not destined for a tablet with another name. If you install the firmware on it, the device will surely end up affected big way.
You aren’t given, with this firmware, the opportunity to upgrade your tablet with KIES. There is another way, besides our guide, to achieve the update. And that is OTA (short for over-the-air). If you choose to grab the update firmware with OTA, the tablet needs to function with stock ROM. When your Samsung SM-T531 doesn’t have this ROM, you can use our guide instead.
The KitKat 4.4.2 is the version that comes with the most chances to optimize a gadget. Which means many tweaks and options that weren’t there before. Then you will have the possibility to choose what new apps to get for your tablet. The performance of your device will benefit plenty from the update, too. As will the battery, which will last so much more than it did. New features can also be experienced.
A rooted device will no longer enjoy root access if it’s updated. An upgrade also means the loss of your tablet’s system partition. But it won’t mean damaged internal / external SD cards or the loss of important data.
Prerequisites
This is how our requirements look like:
- a laptop that uses Windows needs to be used for the guide;
- a full charge of the tablet’s battery unit is required;
- the tablet’s security programs must be disabled for this procedure;
- same goes for the security programs installed on the laptop;
- a regular backup needs to be made in order to protect the tablet’s crucial data;
- don’t forget to also create a full NANDroid backup;
- USB drivers working with your tablet have to be installed on your notebook;
- the USB Debugging option featured on your tablet must be turned on.
Step by step instructions
If you want to know what steps to follow so that the new firmware ends up on your tablet, look below.
- We will need you to do the following for the first step: download and on your laptop. This isn’t the only package that needs downloading. Odin v3.09 is the name of the second one.
- If the download of both packages is done, go on and unzip them both, then open this on the notebook: Odin v3.09.exe. After its launch, move on to this action: start your tablet in Download Mode.
- This part has to be done like as such: press and hold, at the same time, Home, Power and Volume Down, then allow the device to come up with a boot message. When it does, press only this button: Volume Up.
- For the next phase of this tutorial, connect the Galaxy Tab 4 10.1 3G SM-T531 to the laptop. Help for this part comes from your tablet’s USB cable. When the plugging is done, the Odin will have a blue sign for display.
- After this step, the firmware file will need to be added to the AP / PDA. This is followed by the appearance of certain boxes with different names next to them. The ones with F. Reset Time and Auto Reboot written close to them have to be checked next. The box with a Re-partition name has to be unchecked.
- As for how to begin the installation of the new firmware: just tap “Start” and let this task do its thing. The flashing will only end when the tablet displays “Pass” in green on the display and restarts. Once you’re sure both of these things happened, make sure the tablet and your laptop aren’t connected to one another.
- [sc name=”banner-jos”]If you’re done removing the USB cord, tap Settings first, then tap About Tablet. By doing as instructed, you will have the chance to quickly open the Android 4.4.2 XXU1AND8 on your Galaxy Tab 4 10.1 3G SM-T531.
By launching the firmware on your device, you can see if it is as great as we said. If, however, you start missing the old ROM, you can restore it at any time. When you want that, simply use the NANDroid backup file to revoke the upgrade procedure.
You can leave your comments and questions below!


